Getting Started with n8n + MCP
Enable your n8n automation workflows to use the latest MCP tools!
 Yuanlin Lin
Want to integrate AI tools into your workflow without writing tons of code? This article will guide you step-by-step: using n8n with Claude’s MCP (Model Context Protocol) tools to create smarter automation flows. And we’ll use Zeabur for one-click deployment—the whole process is super easy. You’ll be ready to go in no time!
🌱 Background: What are n8n and MCP?
✨ What is n8n?
n8n is an open-source workflow automation tool. In short, it lets you connect different apps like LEGO blocks and automate tasks without needing to code. It supports 300+ popular services.
Imagine form responses automatically going into Google Sheets, sending alerts to Slack, or even asking AI to help process content—n8n makes it all possible!
🧠 What about MCP?

MCP (Model Context Protocol) is an open standard developed by Anthropic to help large language models like Claude easily connect to external tools or data sources. Think of it as a bridge that links AI to the real world.
With MCP, AI doesn’t just sit back and answer questions—it can actively look up data, use tools, and help build powerful workflows.
🚀 Let’s Start: Run n8n + MCP!
Now let’s walk through the full process. Just follow along and you’ll have your own n8n running on Zeabur, fully equipped to use MCP tools.
Step 1️⃣: Deploy n8n to Zeabur with One Click
This part is super simple. Zeabur has already prepared a template for you:
- Open this link: n8n Template
- Click the "One-click Deploy" button
- Follow the on-screen instructions—done in about a minute!
You’ll now have your own n8n web instance ✨
Step 2️⃣: Create Your n8n Account
On first launch, n8n will ask you to create an account. Just enter your email and password.
Step 3️⃣: Install the MCP Community Node
To use MCP with n8n, you need to install a community node (like a plugin):
- Open n8n and click the gear icon "⚙️ Settings"
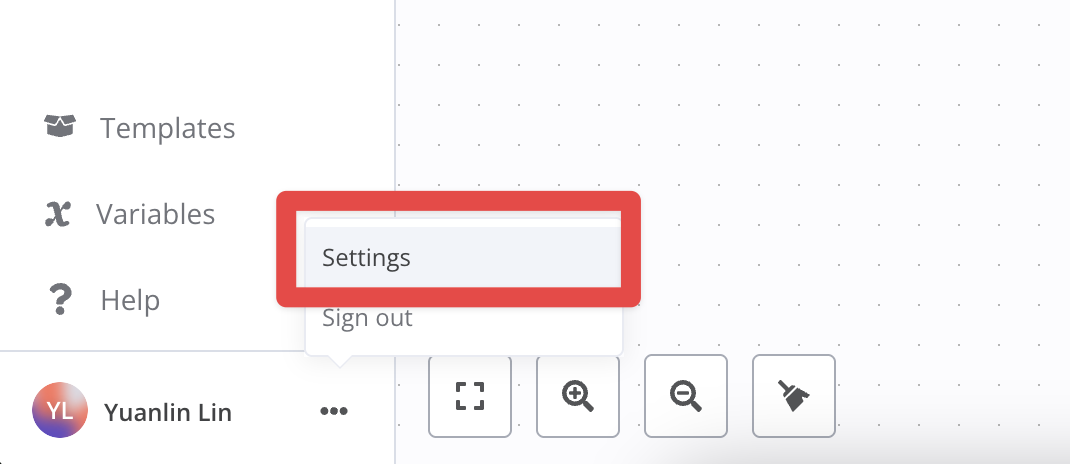
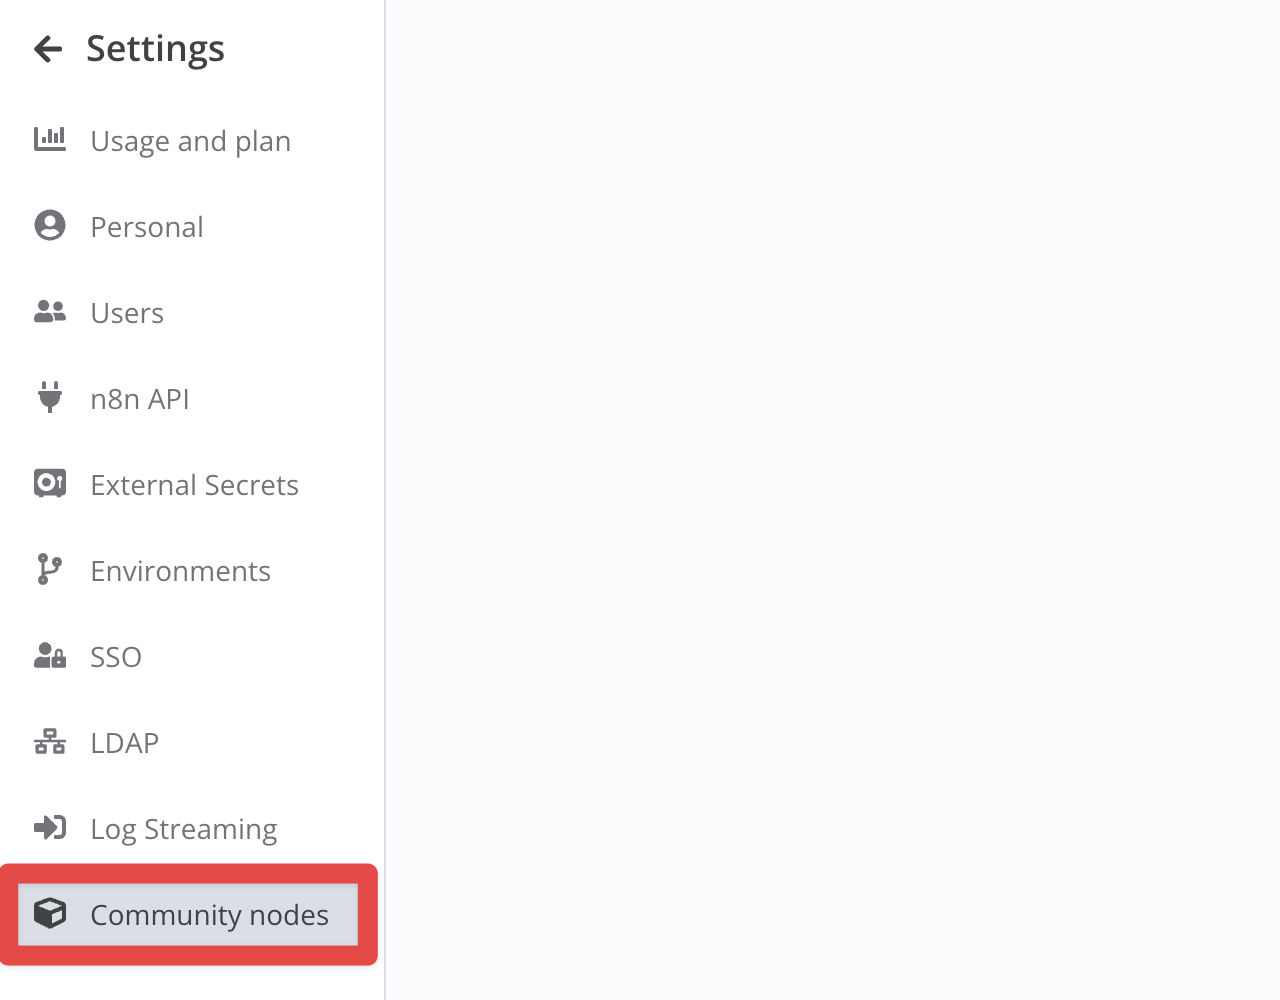
- Switch to the "Community Nodes" tab
- Click "Install New Node" and type
n8n-nodes-mcp
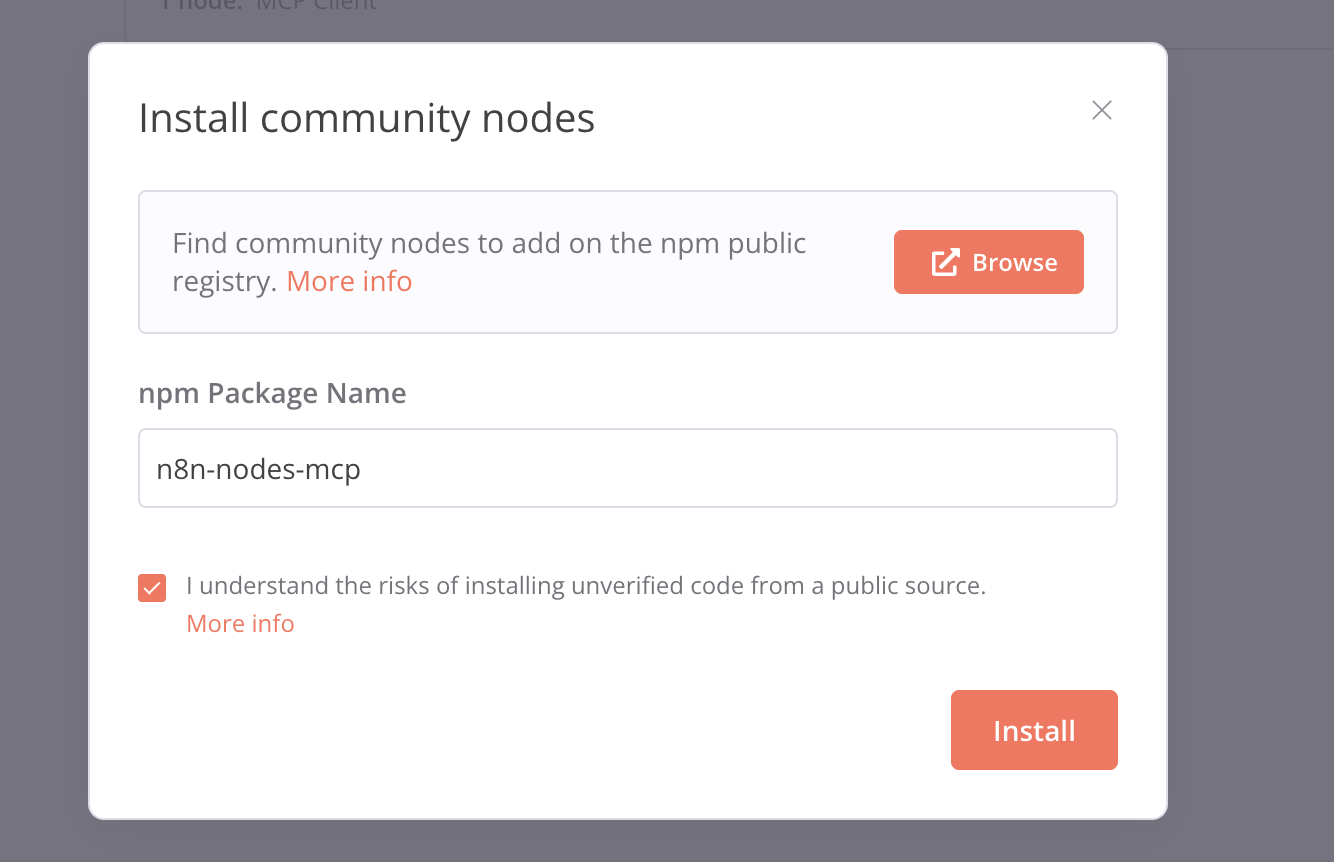
- Click "Install"—and it’s done!
Step 4️⃣: Add the MCP Client Node to Your Workflow
Now you can add an MCP node to your workflow:
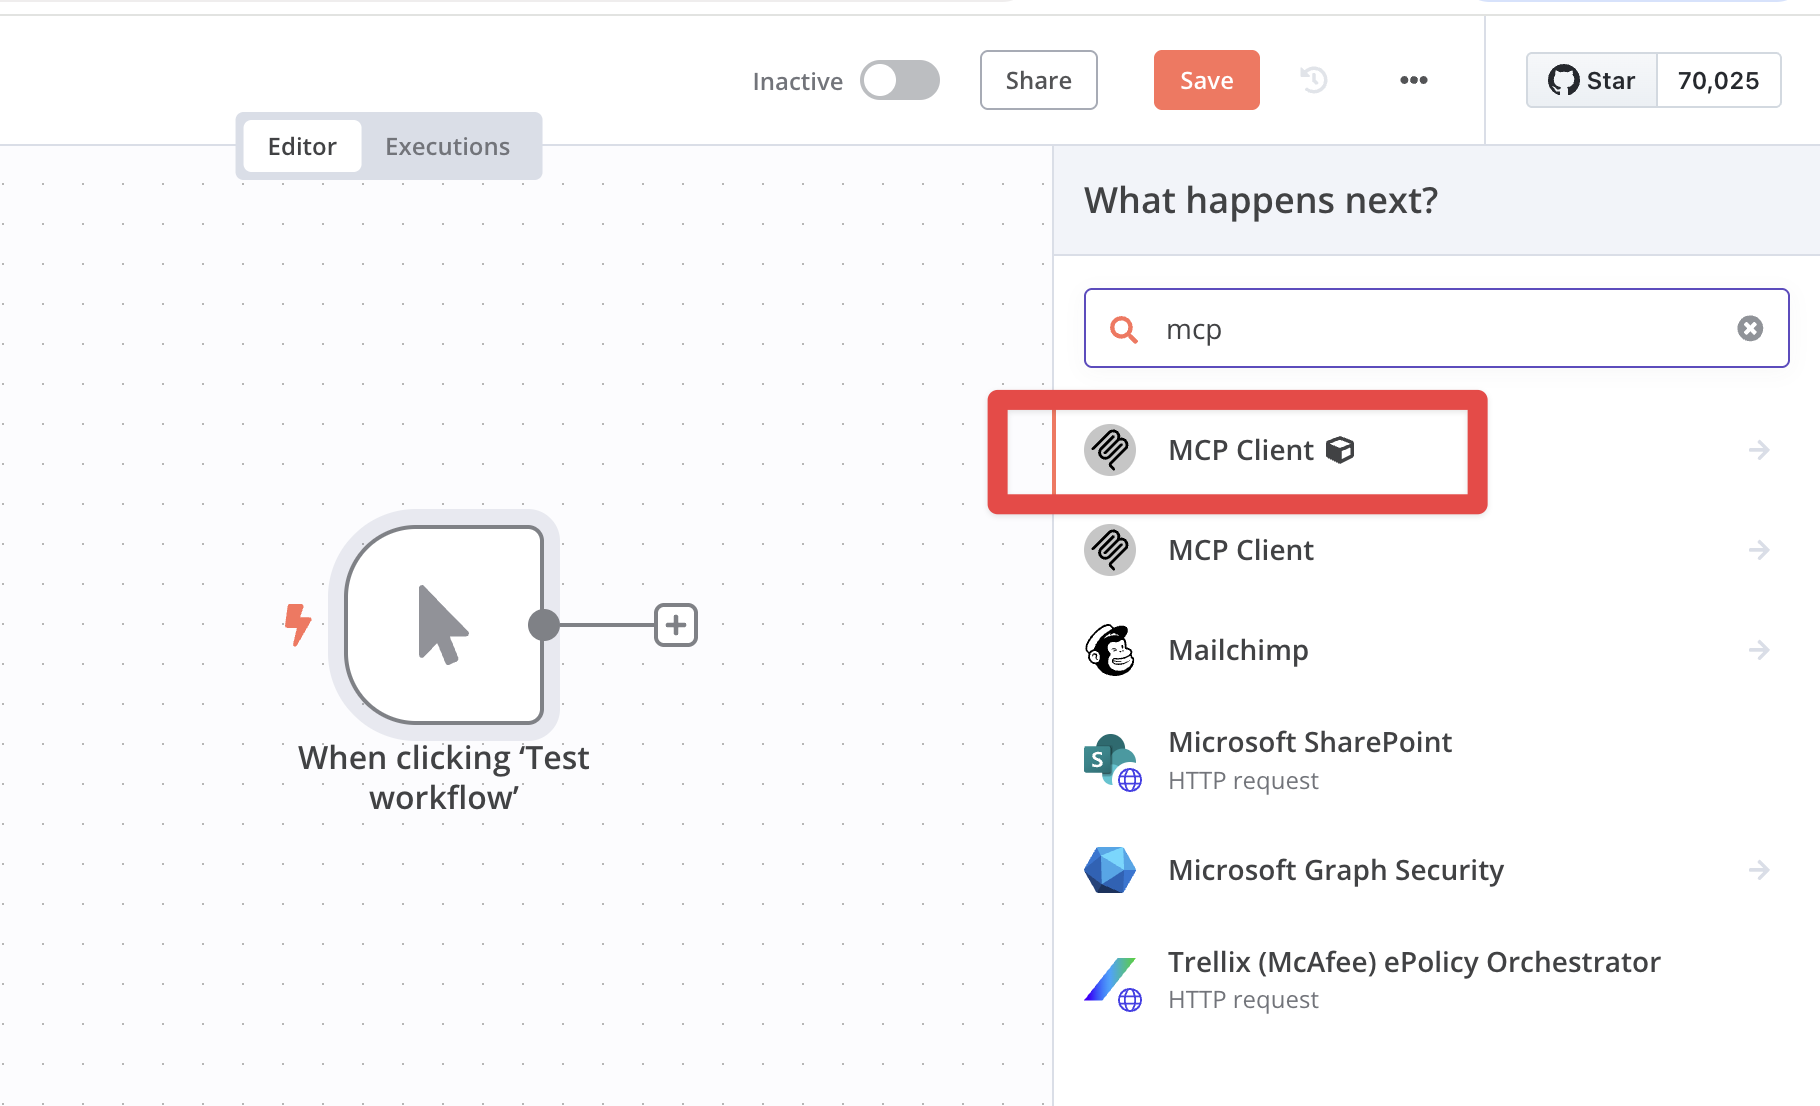
- Create a new workflow (or open an existing one)
- Click "Add Node" and search for
MCP Client, then add it to your flow
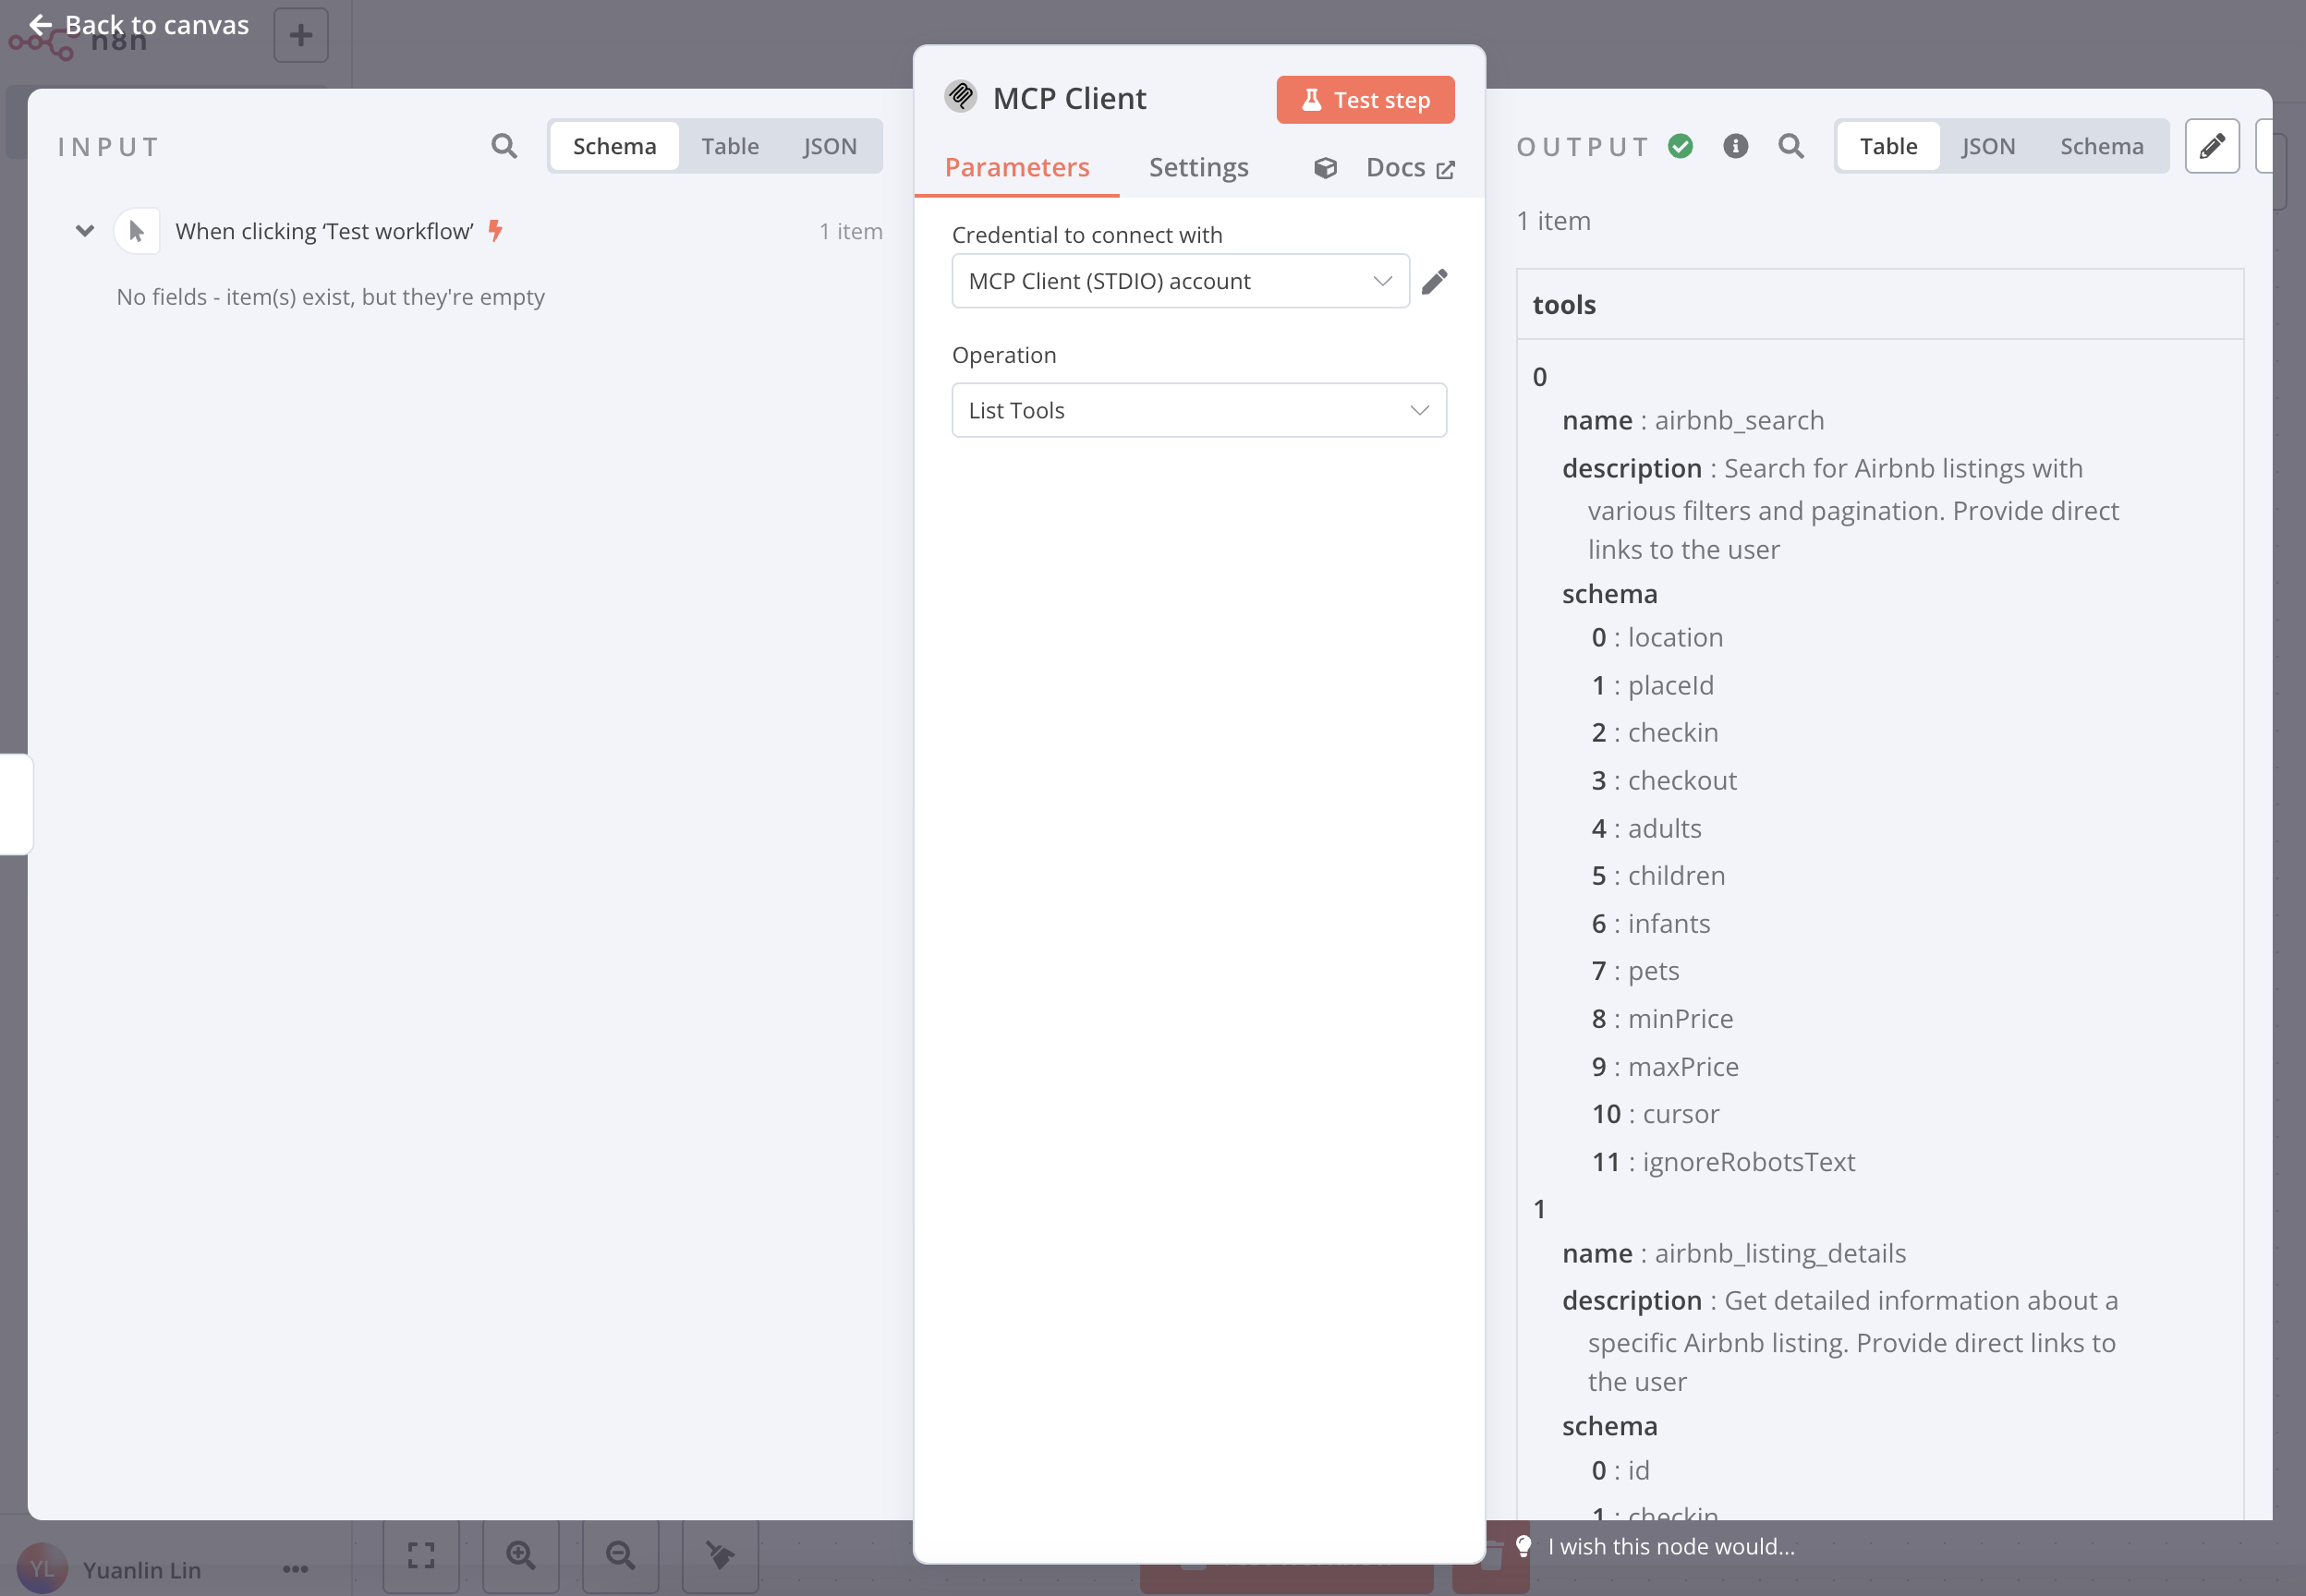
Step 5️⃣: Configure the MCP Client Node
Here’s where the magic happens. You define what the node should do (e.g., list available tools or run a specific one):
- Choose an operation inside the MCP node (e.g., "List Tools")
- Under "Credentials", select "MCP Client (STDIO) API"
- In the "Command" field, enter
npx - In the "Arguments" field, enter
-y <MCP name>
For example, to use the AirBnB MCP server, type -y @openbnb/mcp-server-airbnb
📦 You can browse available MCP tools here:
👉 awesome-mcp-servers GitHub Page
Step 6️⃣: Run Your Workflow and See MCP in Action!
After setup, click the "Execute" button to run the workflow. You’ll see the MCP tools in action—looking up data, transforming it, or integrating with other tools.
🛠️ Can’t Find the Right MCP Tool? Build Your Own!
If no existing MCP tool fits your needs, you can build your own—with AI’s help too!
- Use an AI dev tool (like Cursor or GPT) to generate MCP server code
- Deploy your MCP server on Zeabur
- In n8n, configure the MCP client node to connect to your custom tool
Now you’ve got a fully customized AI integration pipeline 🧑💻
🎉 Wrapping Up: You’re Now an n8n + MCP Pro!
After completing these steps, you should now be able to:
✅ Deploy n8n on Zeabur
✅ Install and configure the MCP node
✅ Enable Claude to use external tools
✅ Even build your own MCP tool
This combo makes your AI workflows incredibly powerful. If you found this helpful, feel free to share it—and let us know what cool stuff you build!