How to Use Zeabur CLI to Deploy a Simple Flask Application
 Eason
EasonIntroduction
This article will guide you to complete the building and deploying of a Flask back-end application from scratch using Zeabur CLI to Zeabur within 10 minutes.
What is Zeabur CLI
Zeabur CLI offers command-line operations for Zeabur Dashboard, allowing developers to provide one-click deployment services for applications quickly without leaving the terminal. With just a few commands, the application can run in the cloud and be configured with a domain for access.
For technical details of Zeabur CLI, you can refer to this article.
Using Zeabur CLI to Deploy a Simple Flask + MySQL Application
Step One: Install Zeabur CLI
You can refer to Install Zeabur CLI for installation according to the operating system.
For example, on the MacOS platform, execute the following command in the command line to complete the installation:
brew install zeabur/tap/cli
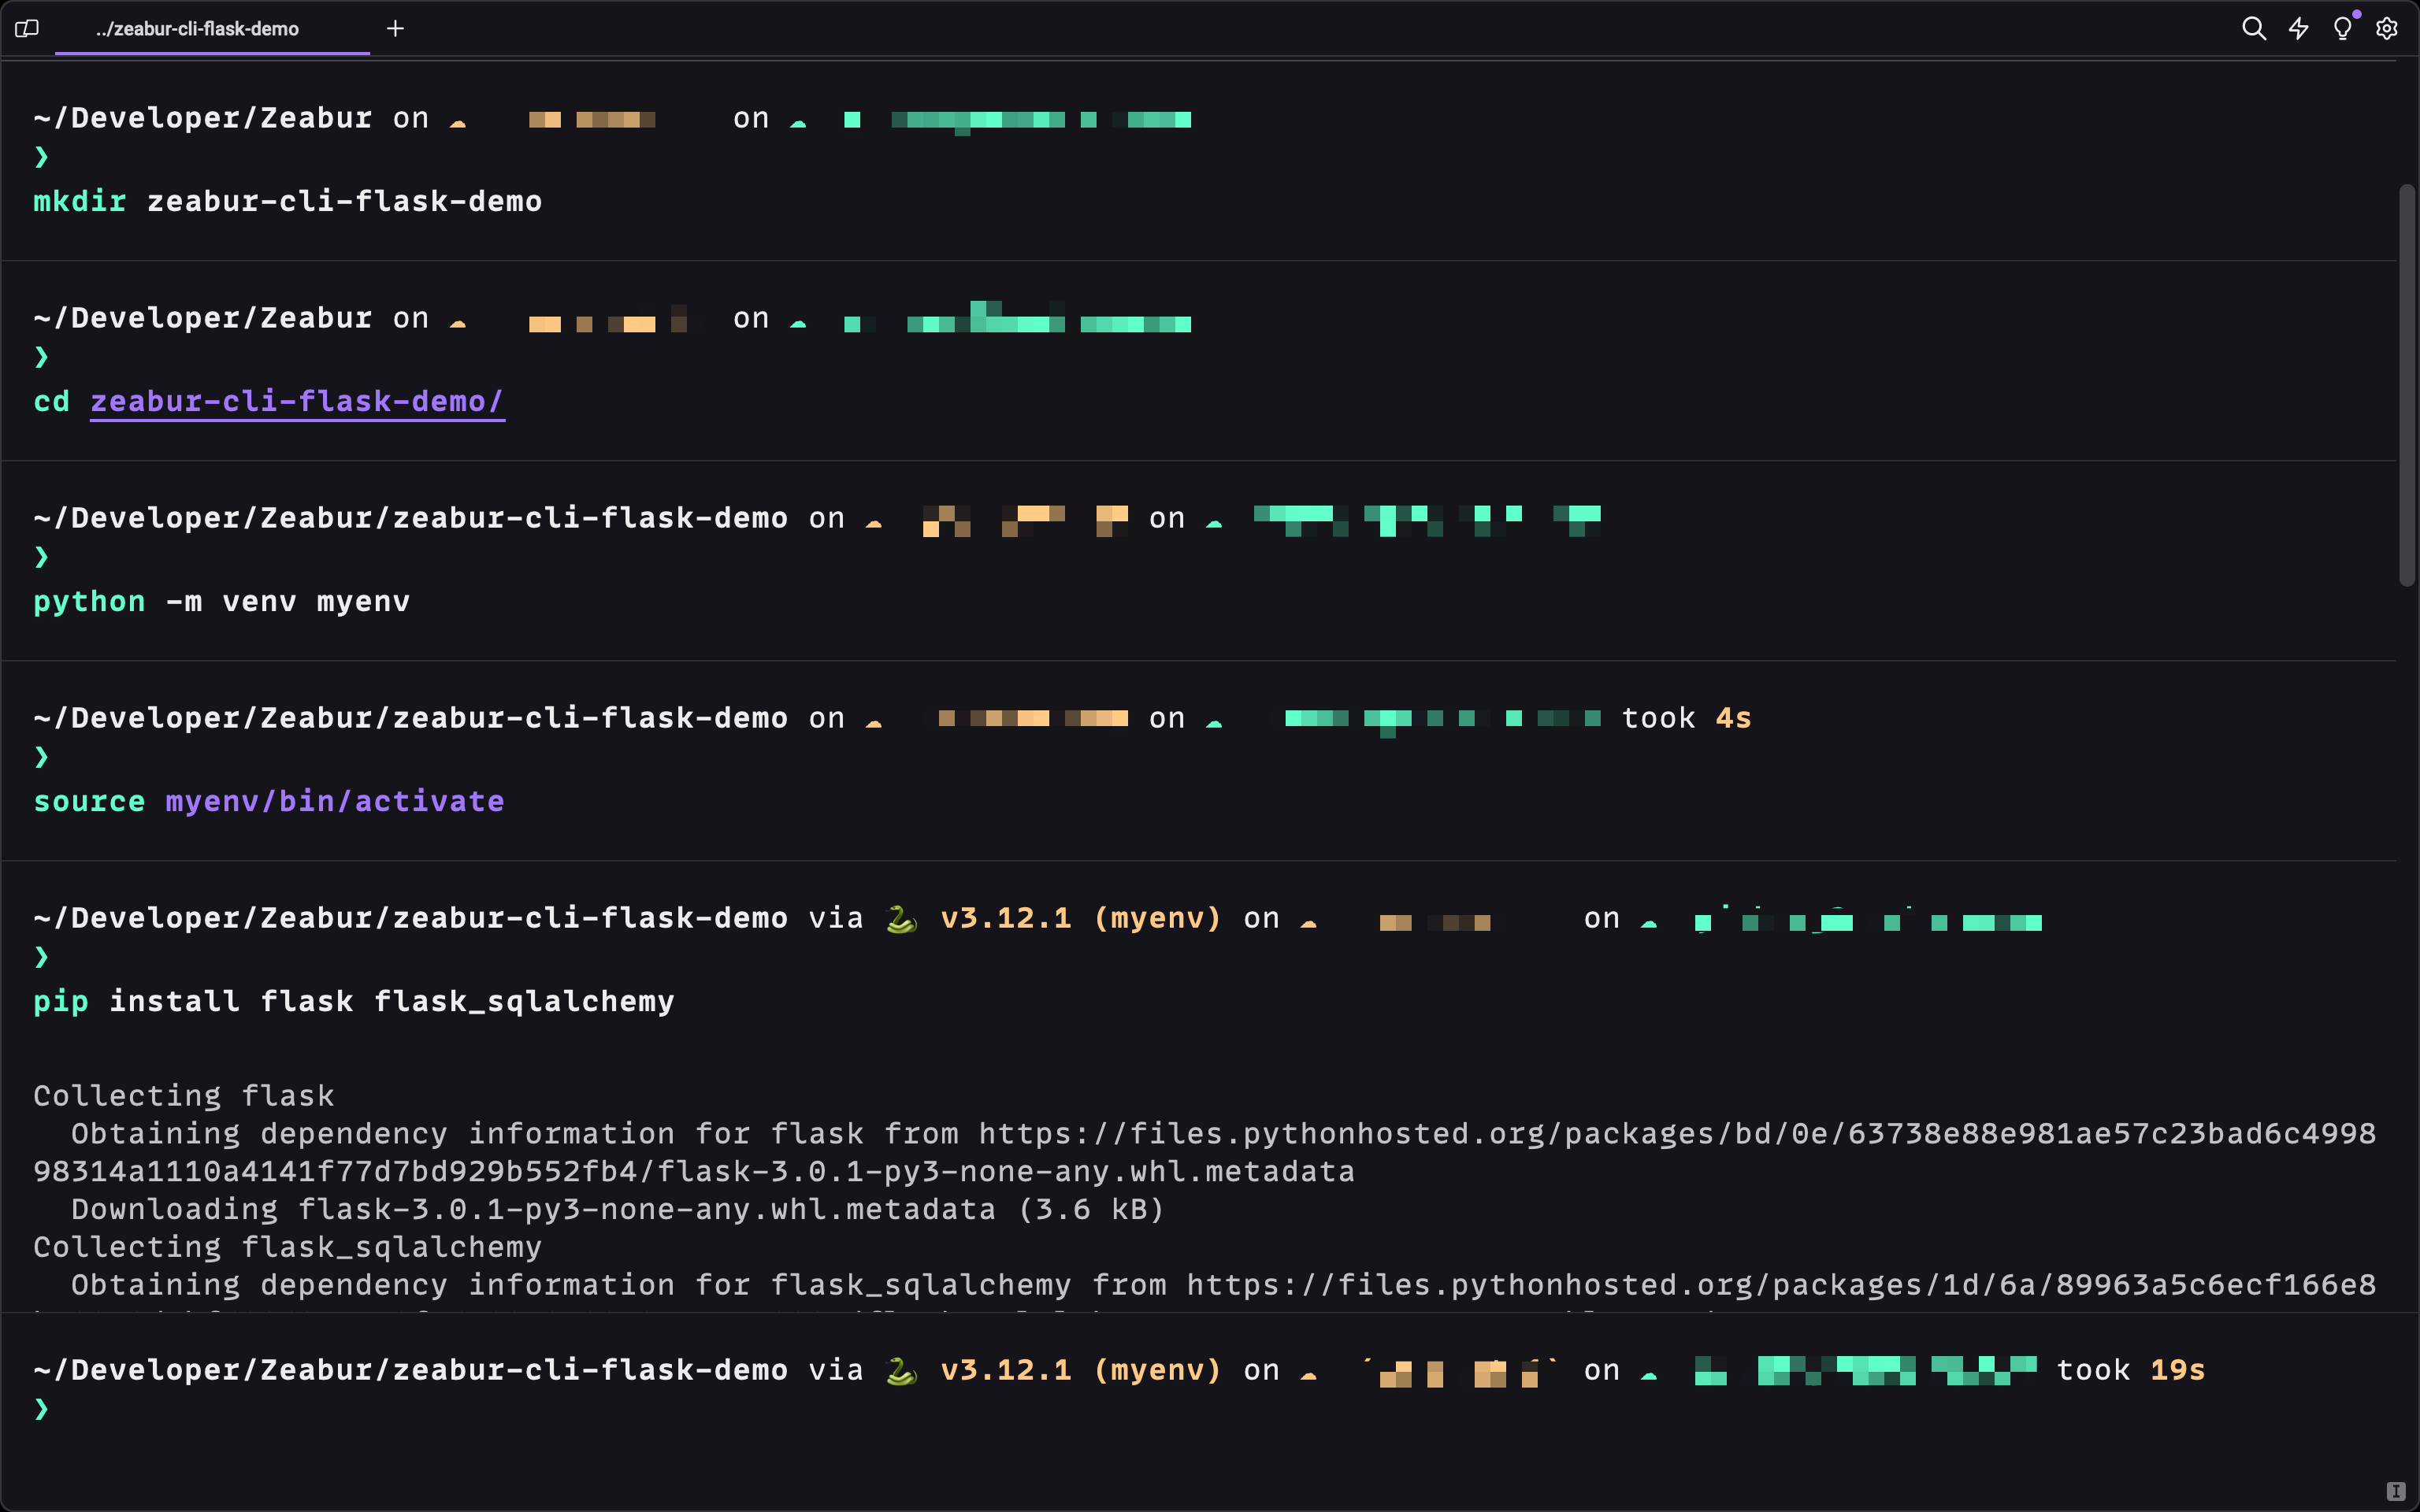
Step Two: Prepare Code Environment
Here we use Flask and MySQL to build the backend application.
- First, use venv to create a virtual Python environment for development and debugging, and then install related dependencies. Here we use flask_sqlachemy as the ORM framework to operate MySQL:
-
Since you need to connect to MySQL, you also need to install mysqlclient dependency. You can refer to this document for installation according to the operating system.
-
Create the app.py file at the directory root. This is the main entry file for the flask application:
-
In the above code, a simple TodoList application is completed. REST API completes the addition/deletion/query of tasks. By reading the environment variable DATABASE_URL, the important information for connecting to MySQL is obtained. The flask web server starts on 0.0.0.0, and the port is obtained through the environment variable PORT.
Step Three: Deploy MySQL Service
In general, backend application development requires testing of the database server. Traditional methods such as local running/ Docker deployment are relatively cumbersome. Zeabur provides a new way to quickly deploy database services:
- Use Zeabur CLI, and enter in the terminal to create a project:
zeabur project create zeabur-cli-flask-demo

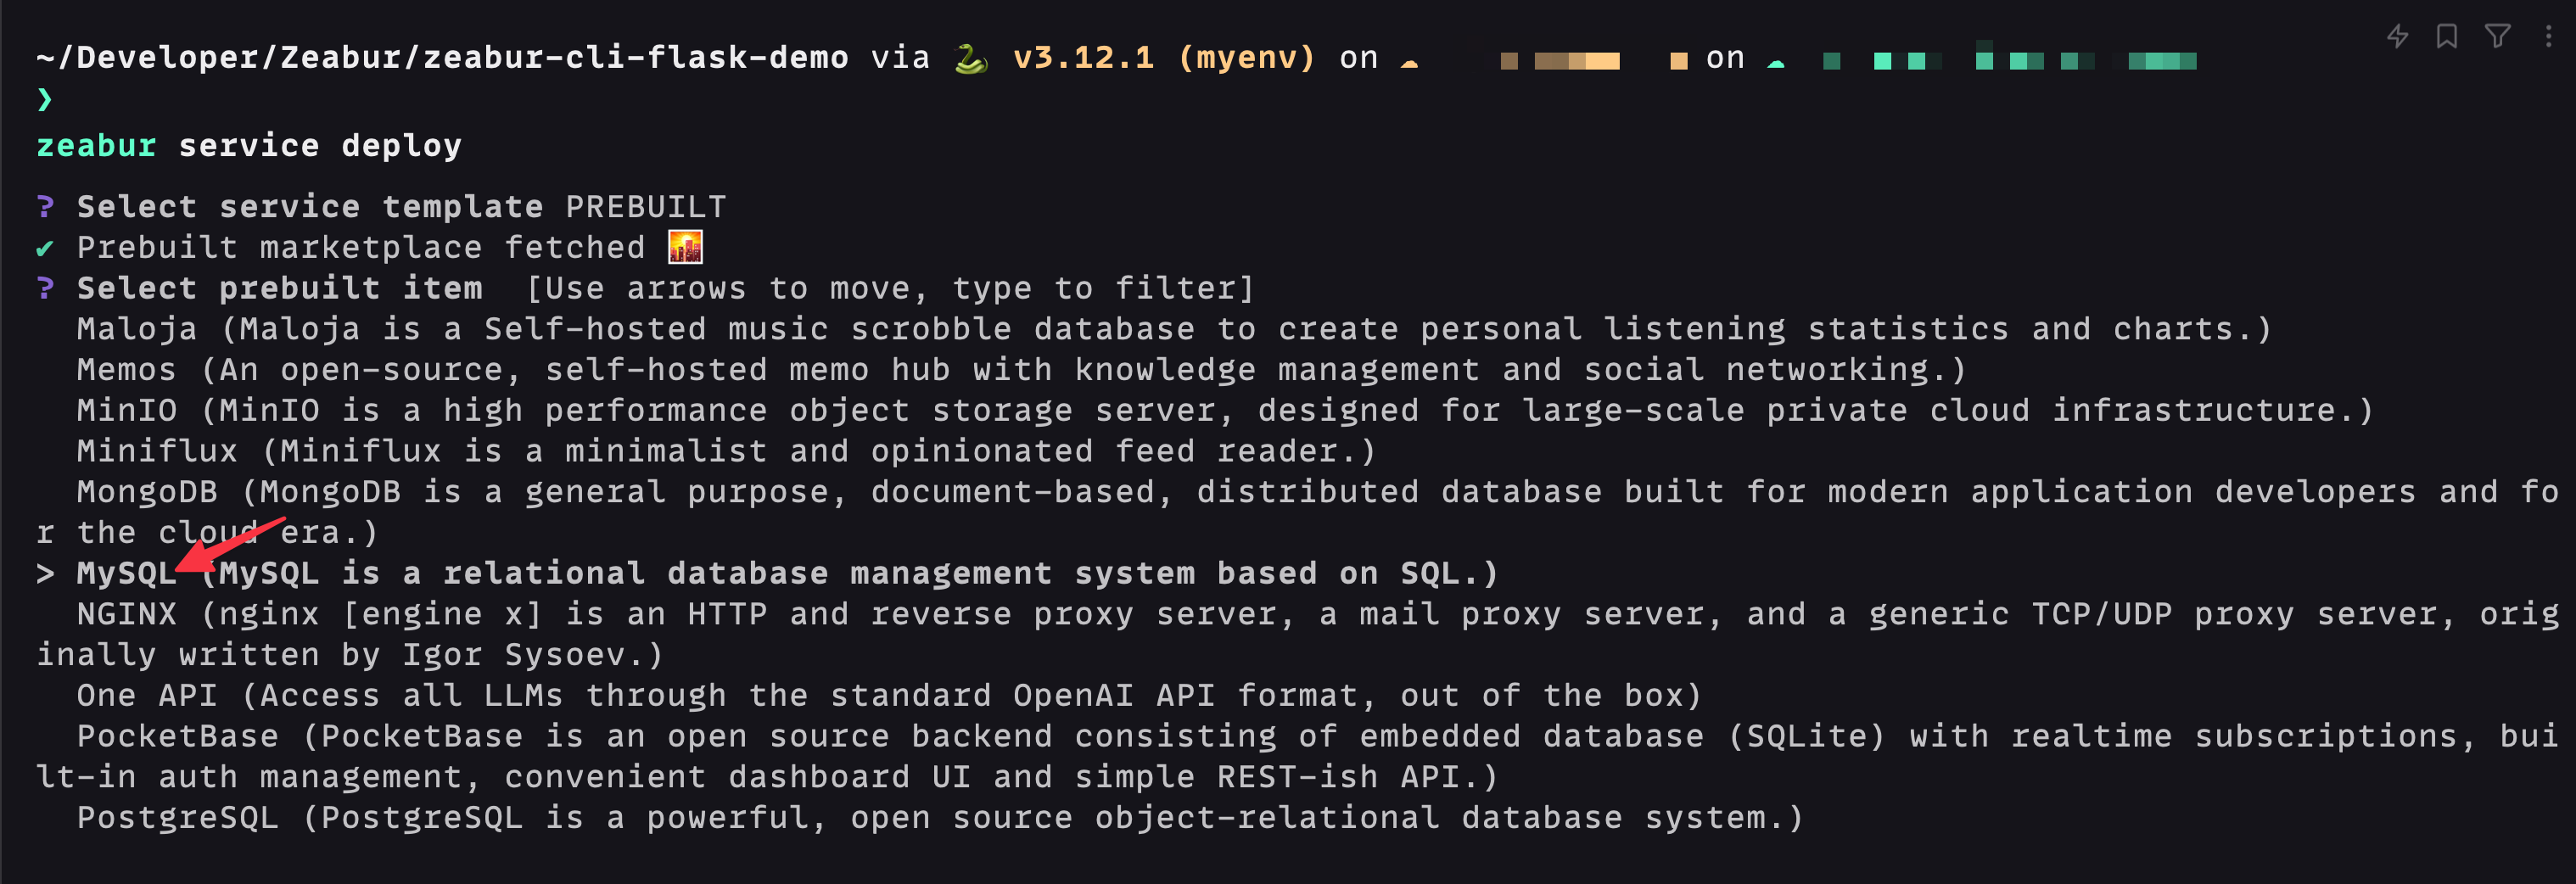
- Create a MySQL Prebuilt Serivice:
zeabur service deployIn the selection box, choose the Prebuilt type, and select the MySQL type in the next selection box:
-
After creation, we can view the Service list in the Project. Enter zeabur service list in the terminal to see the service just created.
-
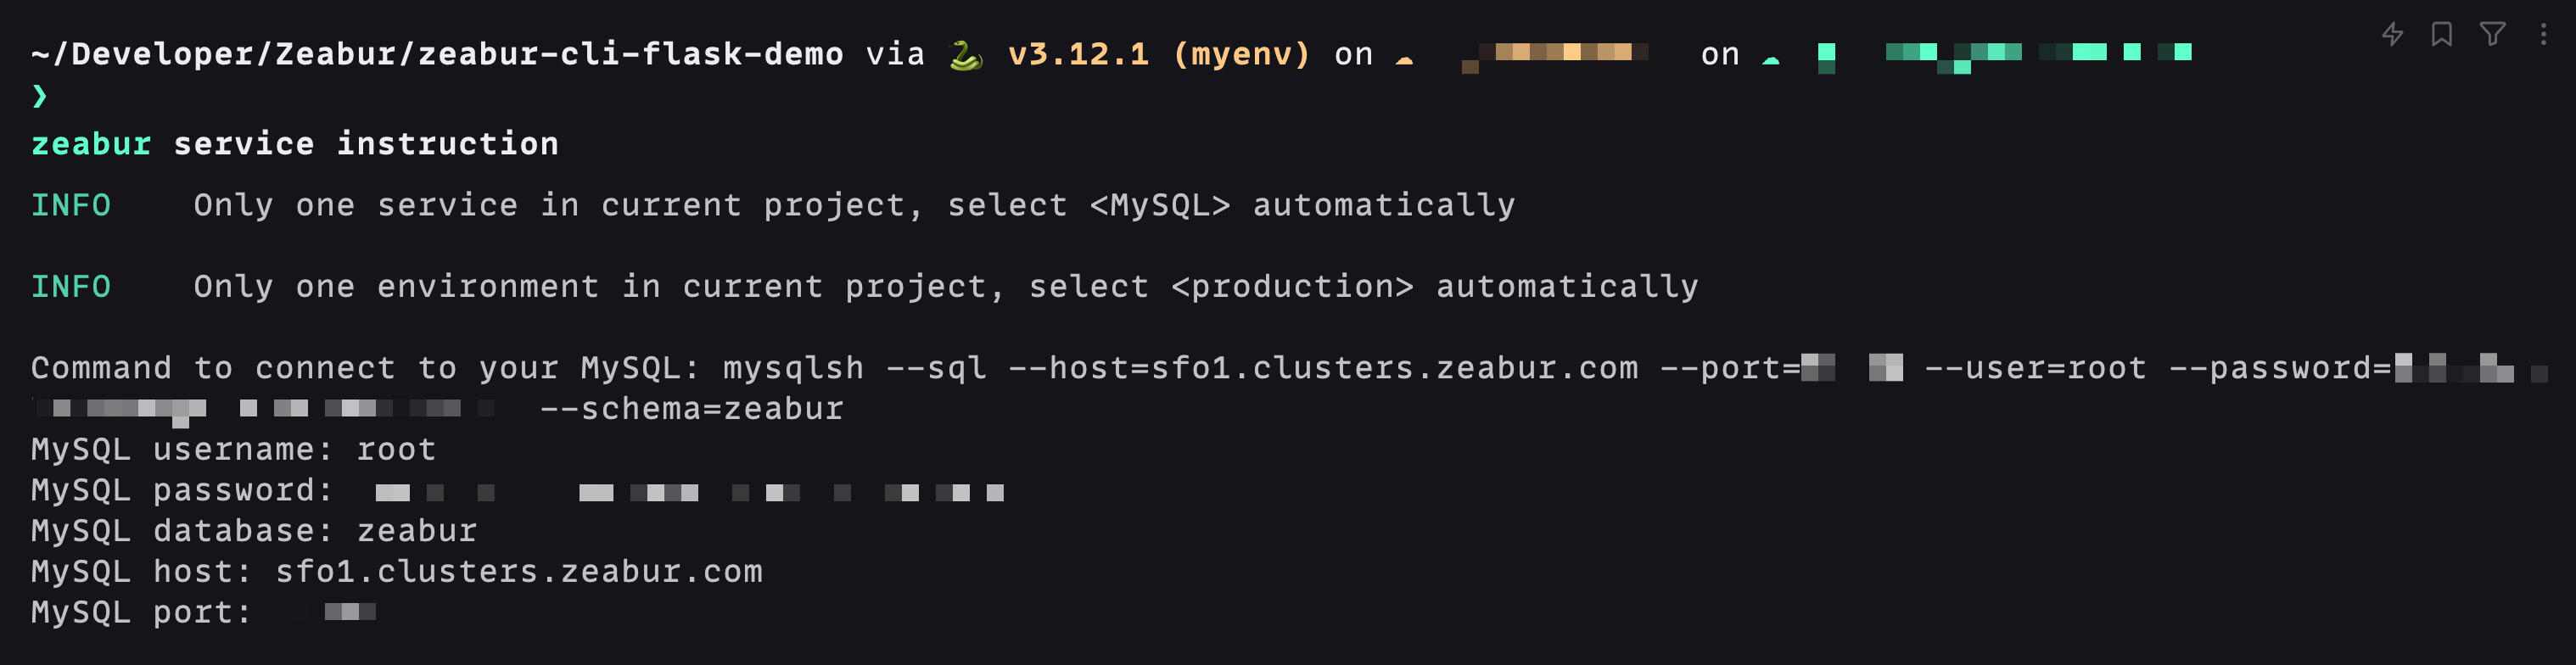
Get connection information, enter in the terminal and select the MySQL Service just created:
zeabur service instructionWe note down this information, and use it in the following steps to connect to the database via the public network:
- Using the above information, start the flask application for local testing. Enter the following in the terminal:
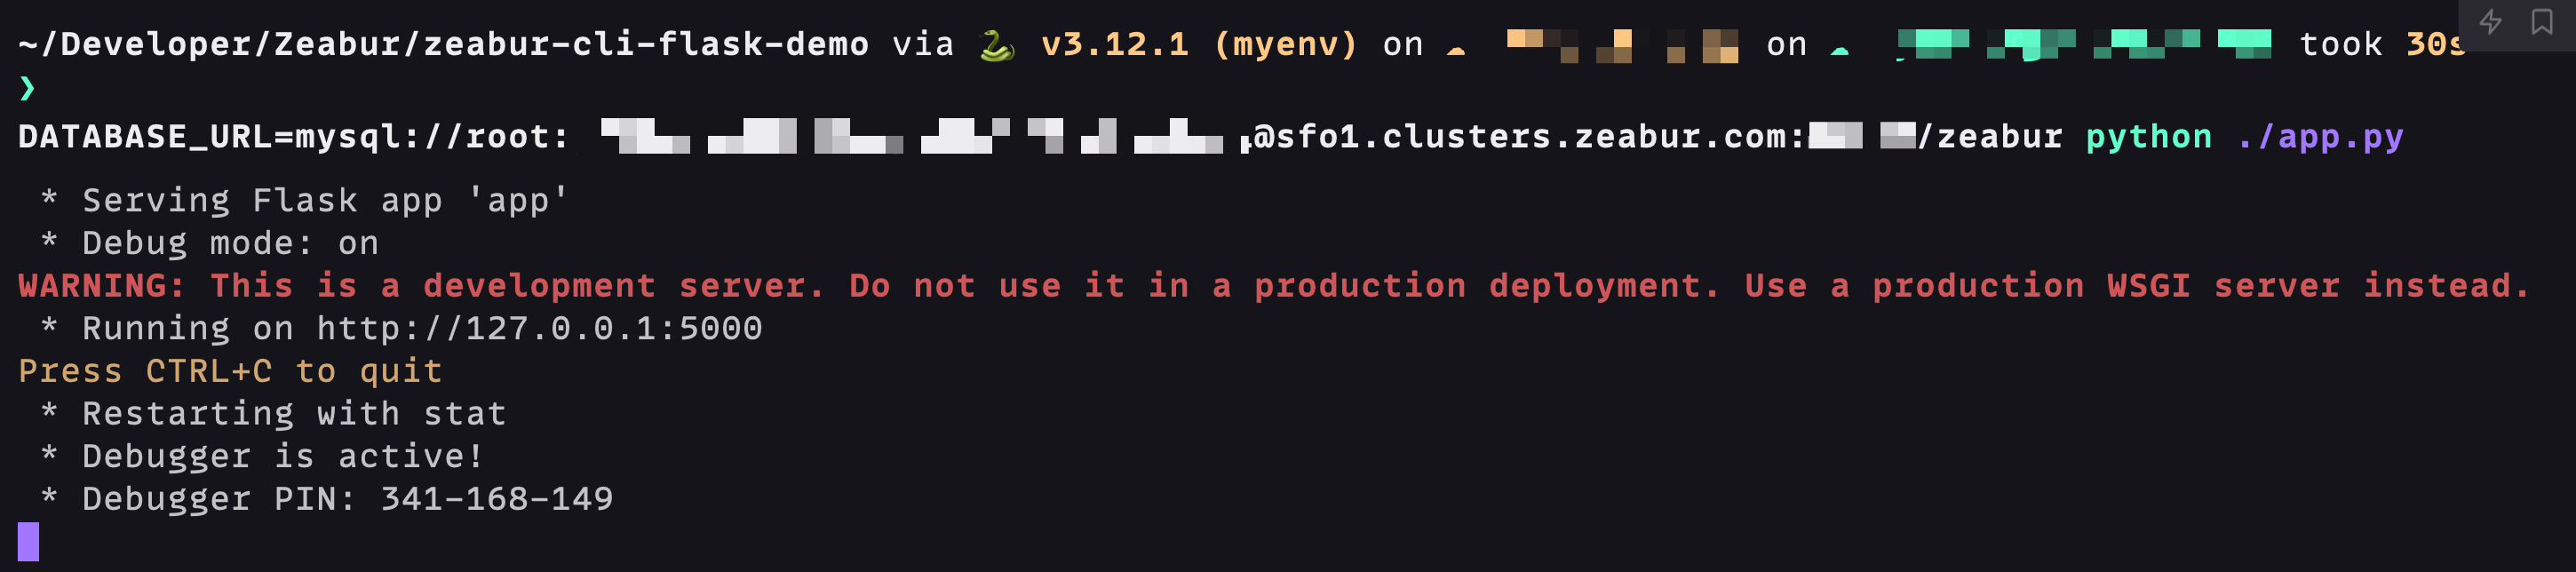
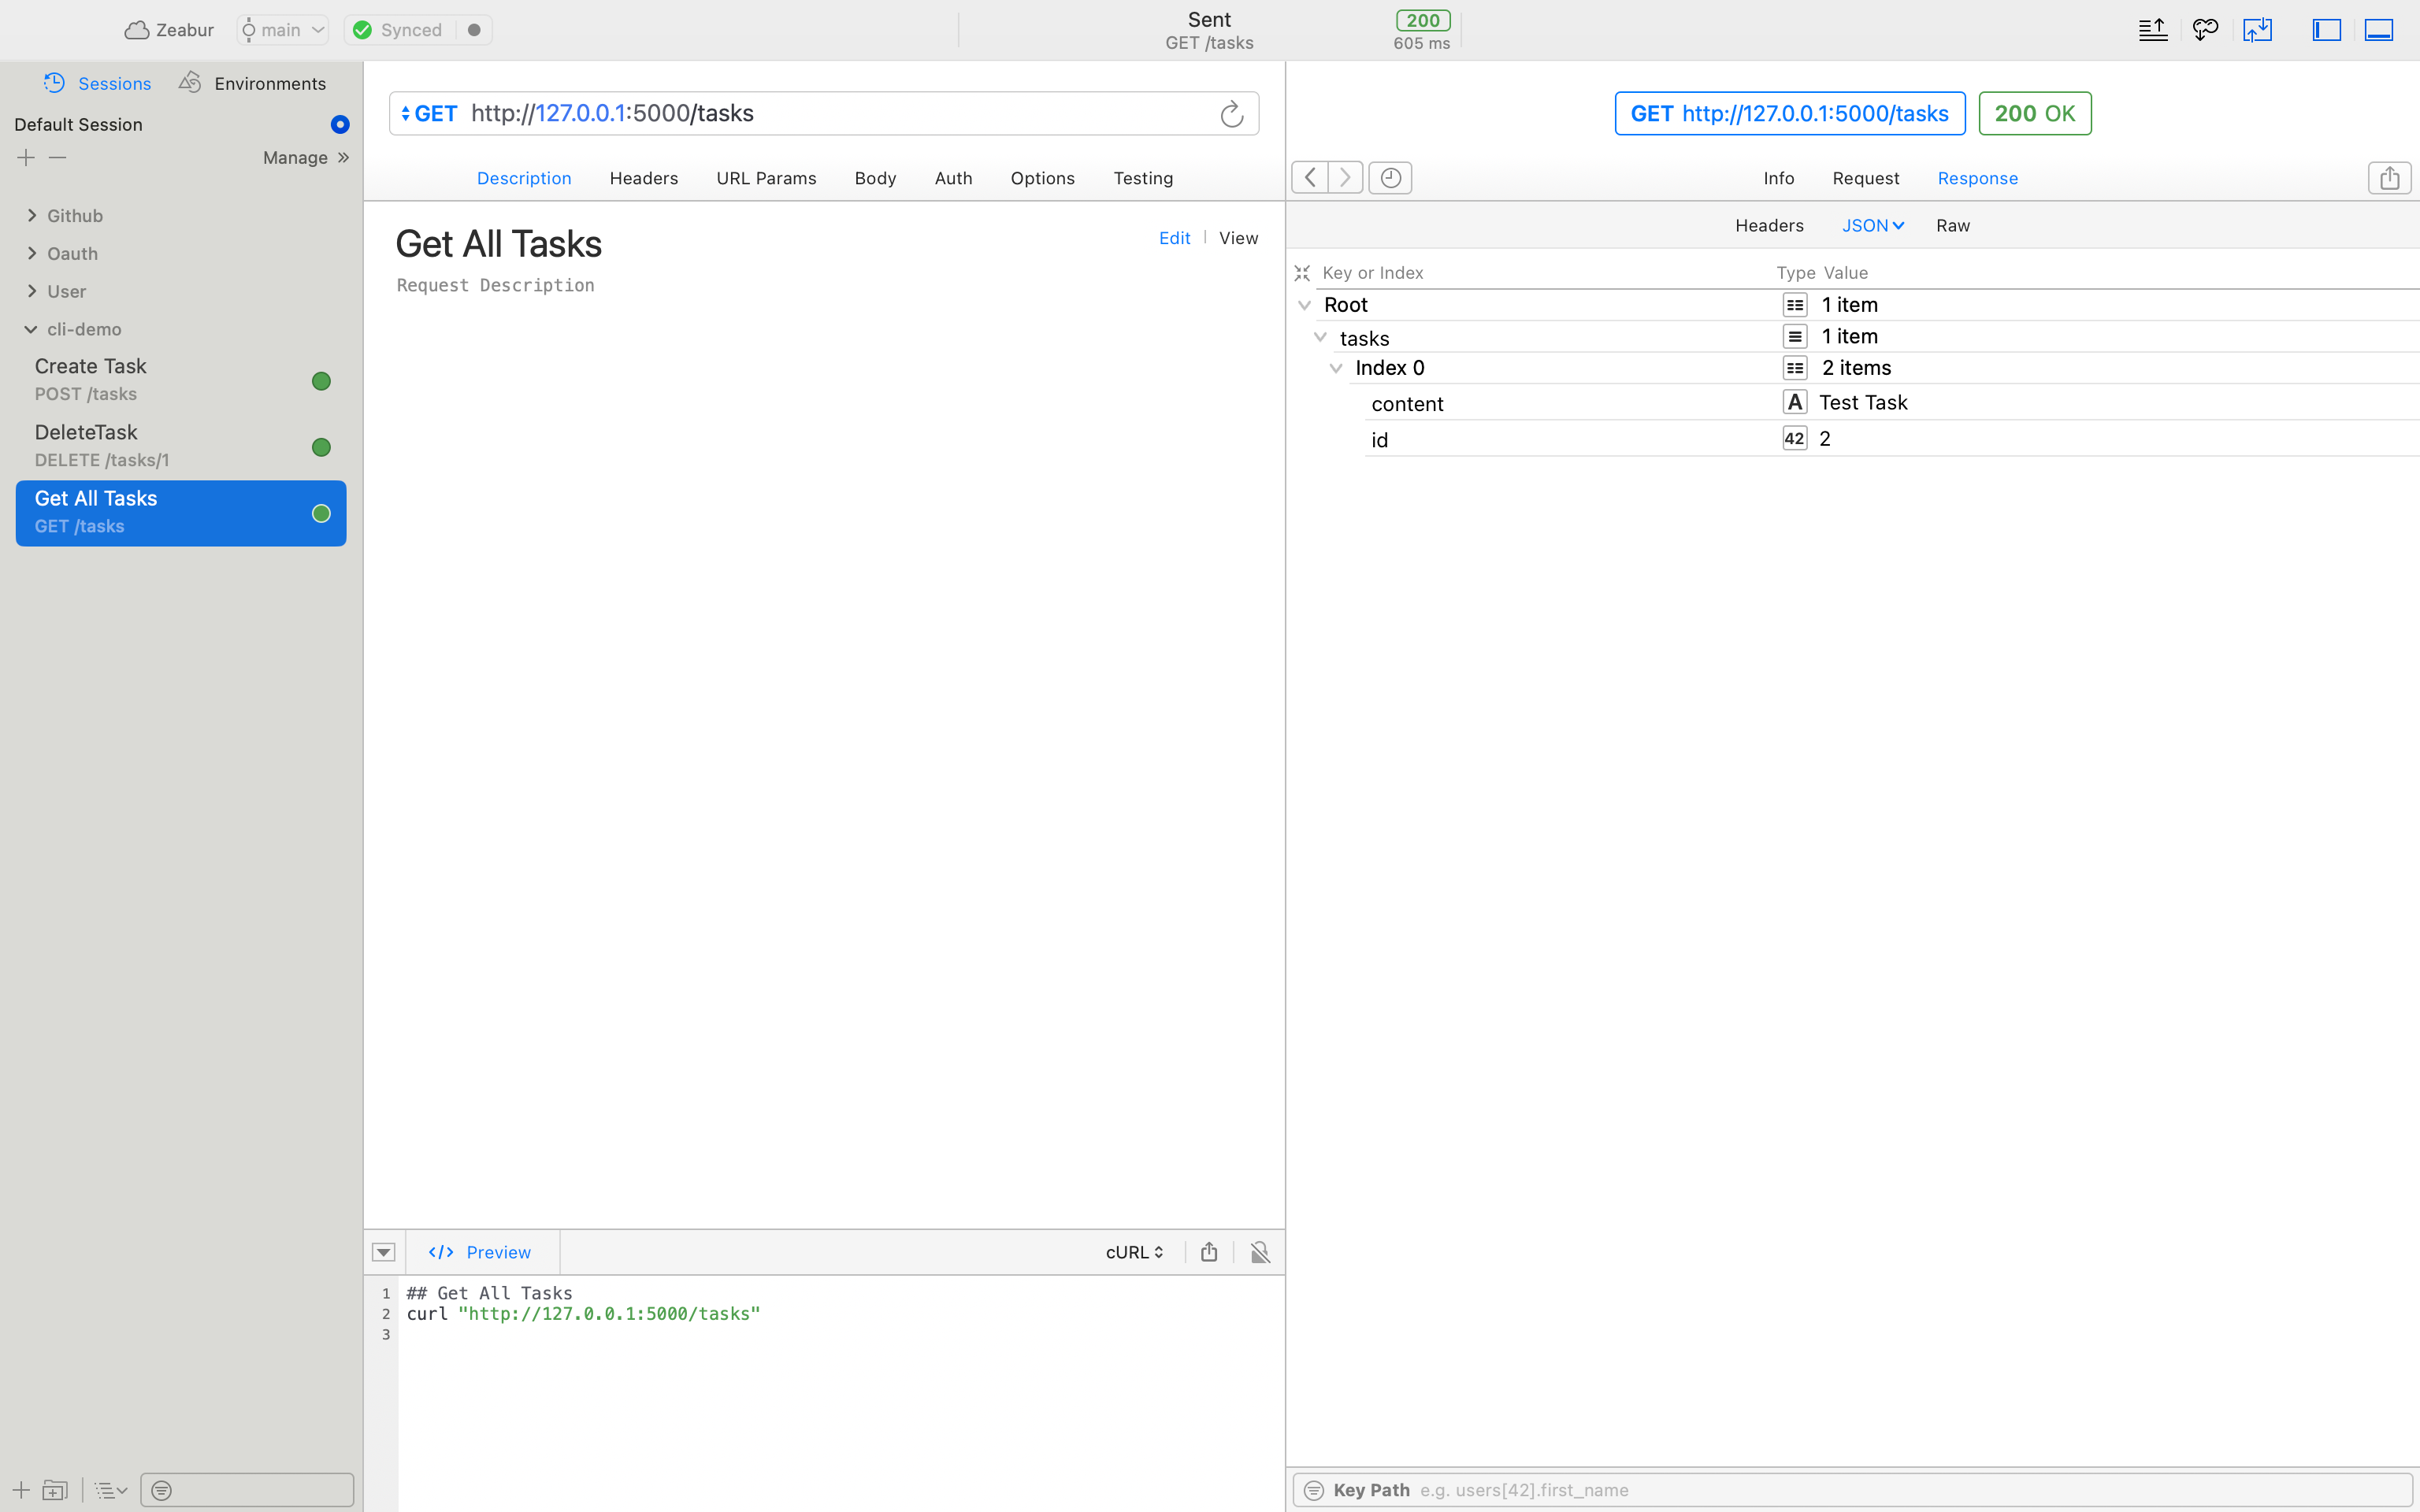
After successful operation, you can use debugging tools like Postman or Paw to test the API:
Step Four: Deploy Backend Flask Application
- Zeabur CLI provides a convenient command to deploy local code to Zeabur with one click. Just knock zeabur in the application directory, and CLI will automatically upload your code and deploy it.

- For the application to run normally, we still need to create environment variables to connect to the database. Since the flask service and MySQL service are under the same Project, we can use Private Networking to connect to the database more efficiently: Check the network information of the MySQL service, enter zeabur service network in the terminal and select the relevant service:

- Based on the above domain name, we create the environment variable of the flask application in turn. Enter zeabur variable create in the terminal:
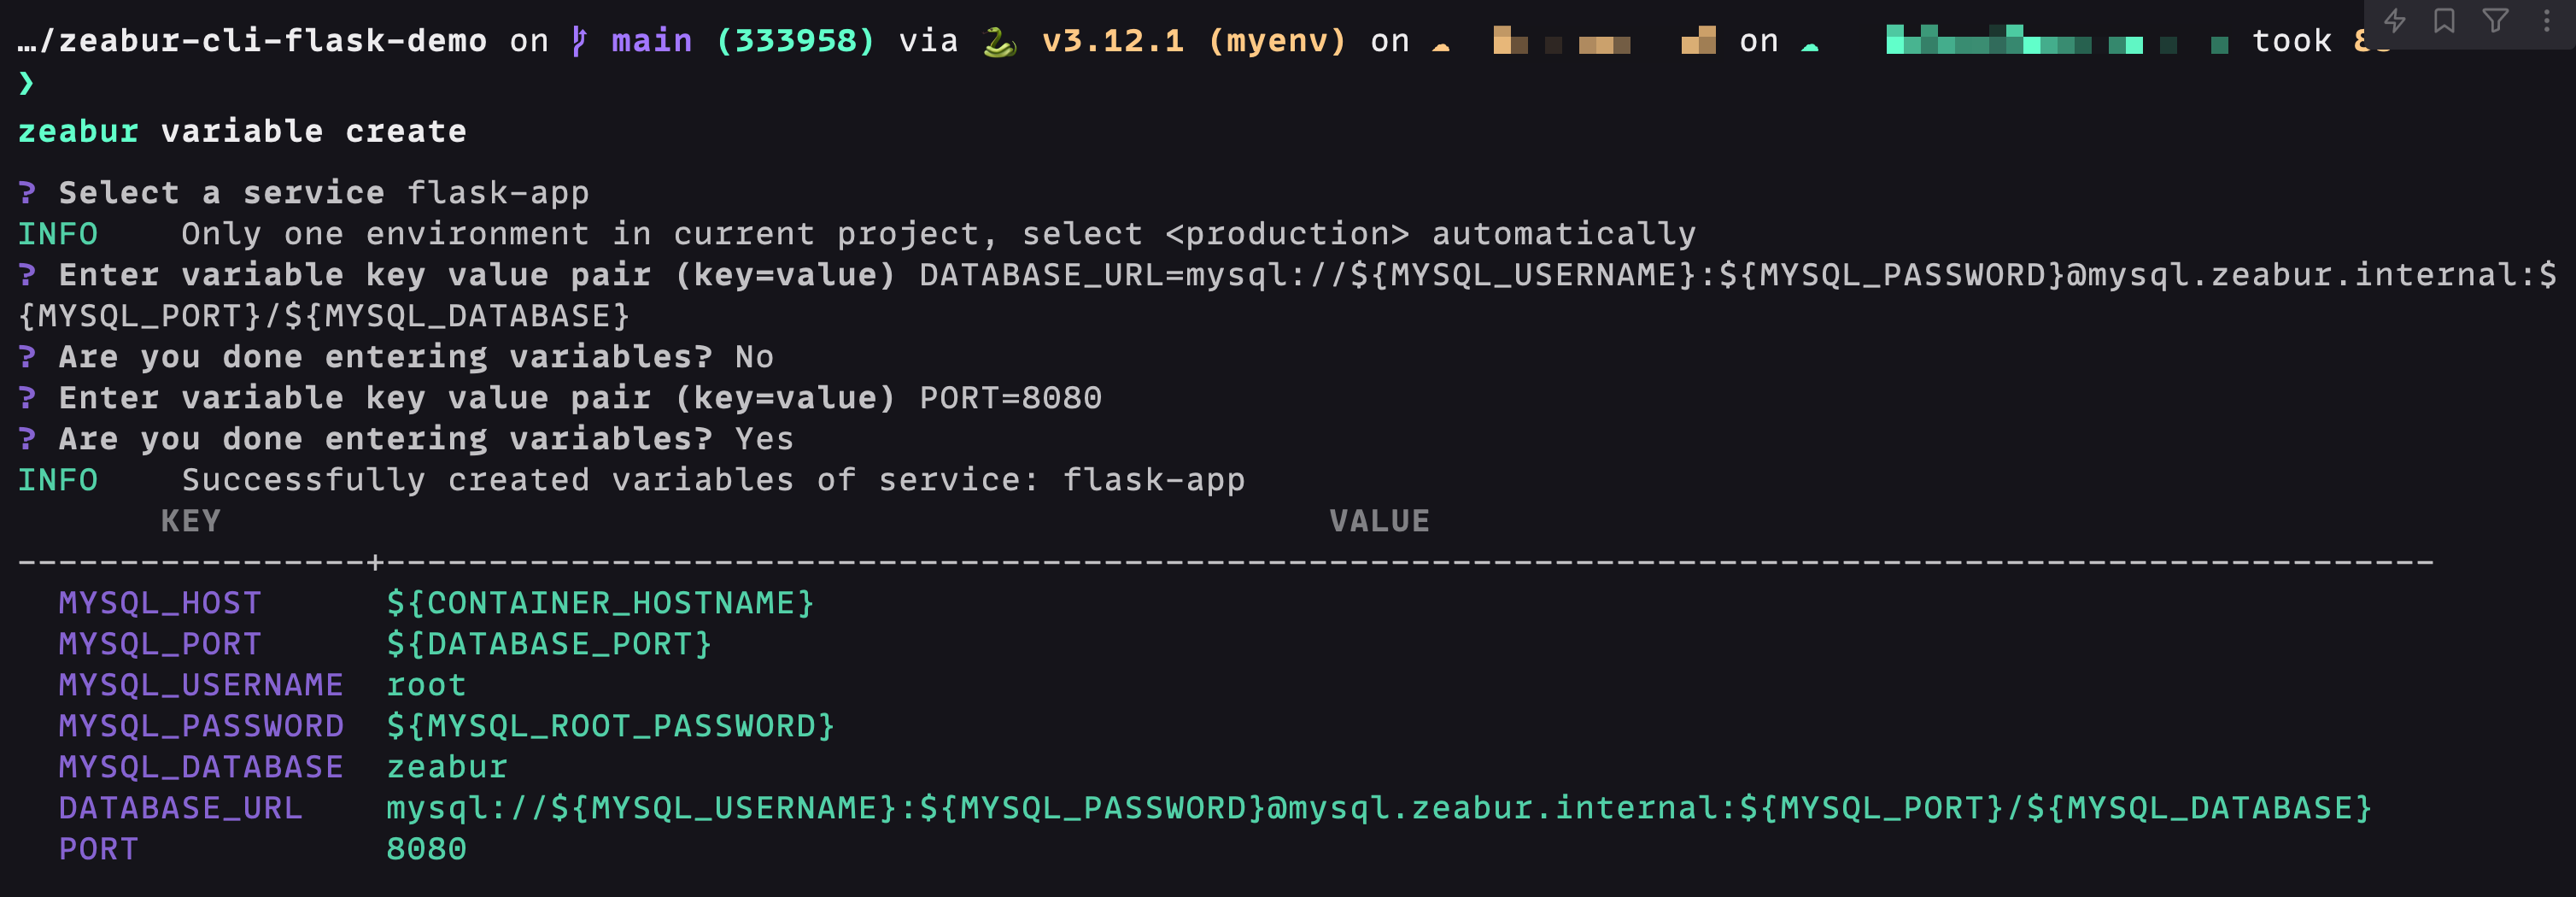
The above environment variables MYSQL_USERNAME, MYSQL_PASSWORD, MYSQL_PORT, MYSQL_DATABASE are all system-generated injections, eliminating the trouble of manual filling. The PORT environment variable allows Zeabur to automatically recognize the web port and automatically bind public network access.
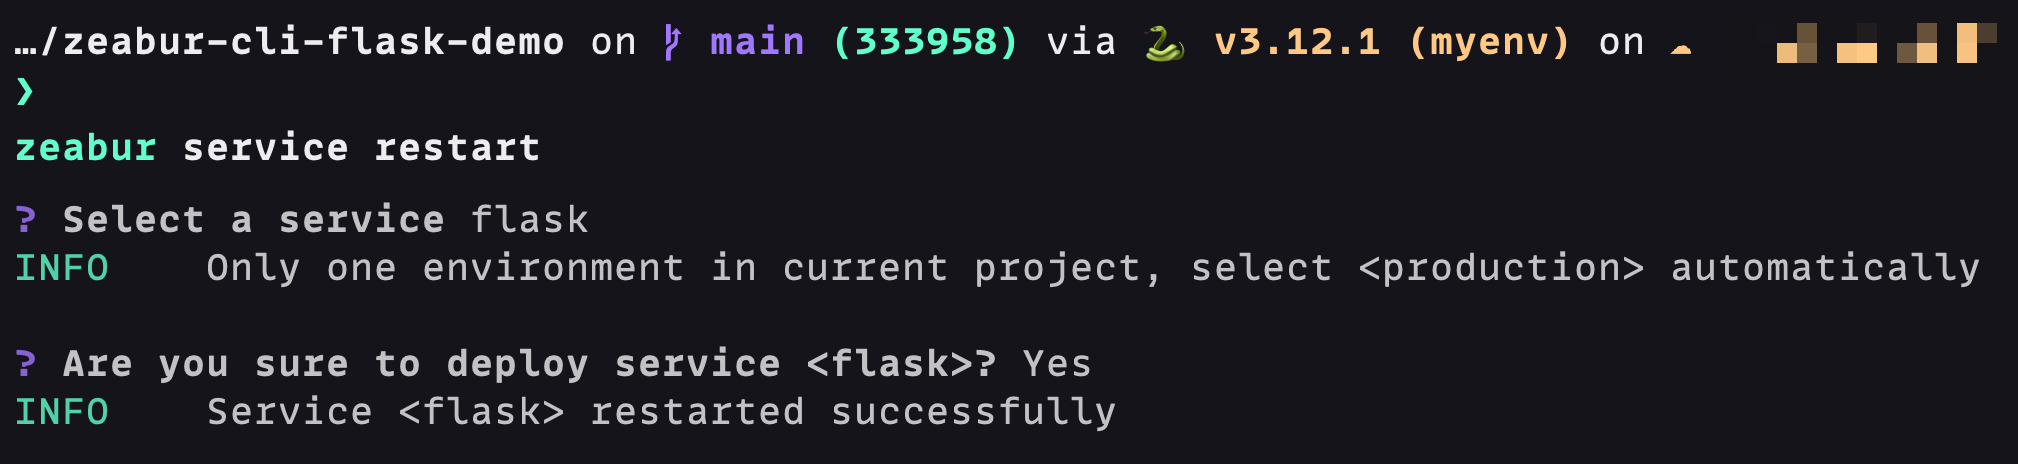
For the service to apply the environment variables, we should restart the service. Enter zeabur service restart in the terminal:
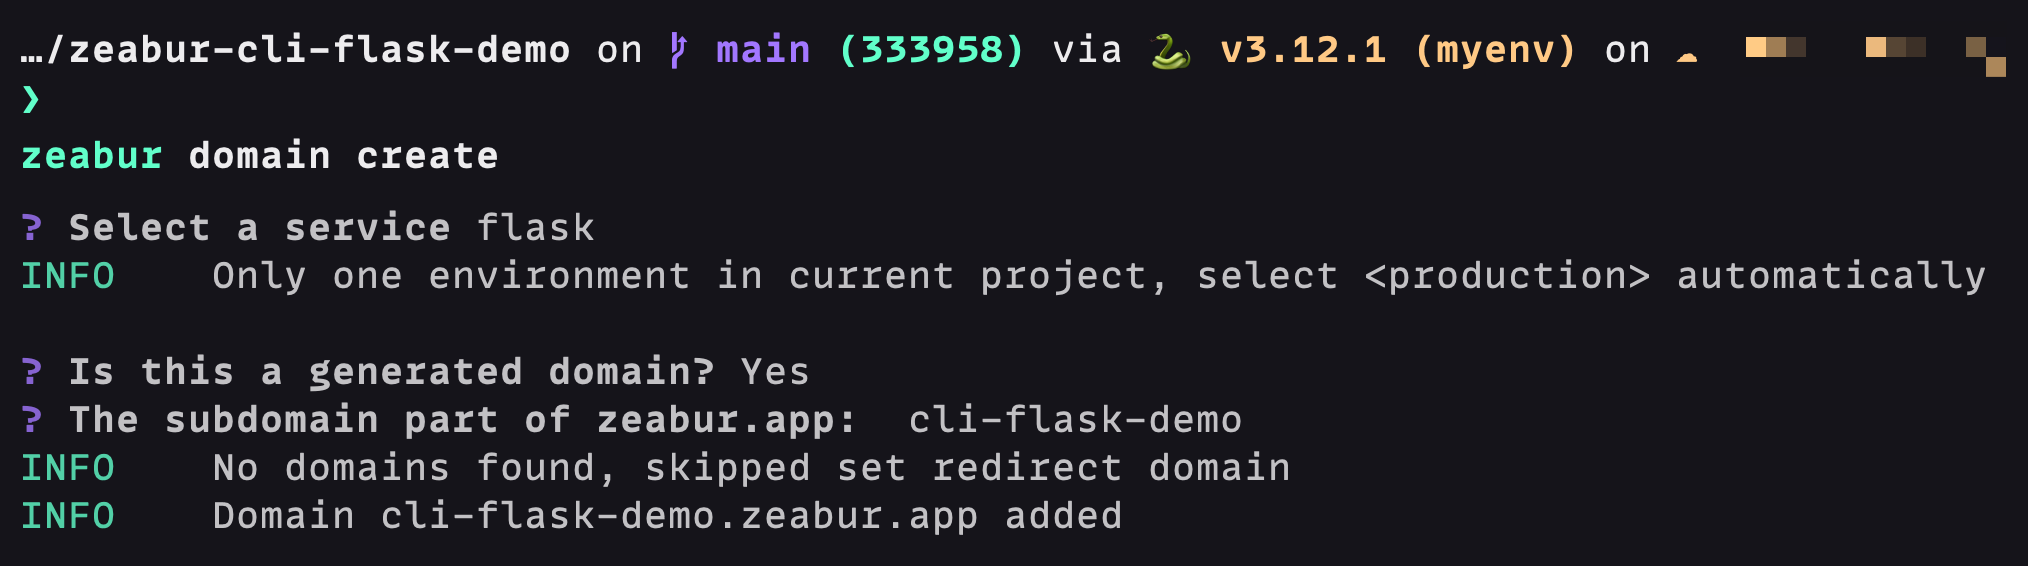
To access the web service on the public network, we still need to bind a domain name. Here we use *.zeabur.app to automatically generate a domain name as an example. Enter zeabur domain create in the terminal:
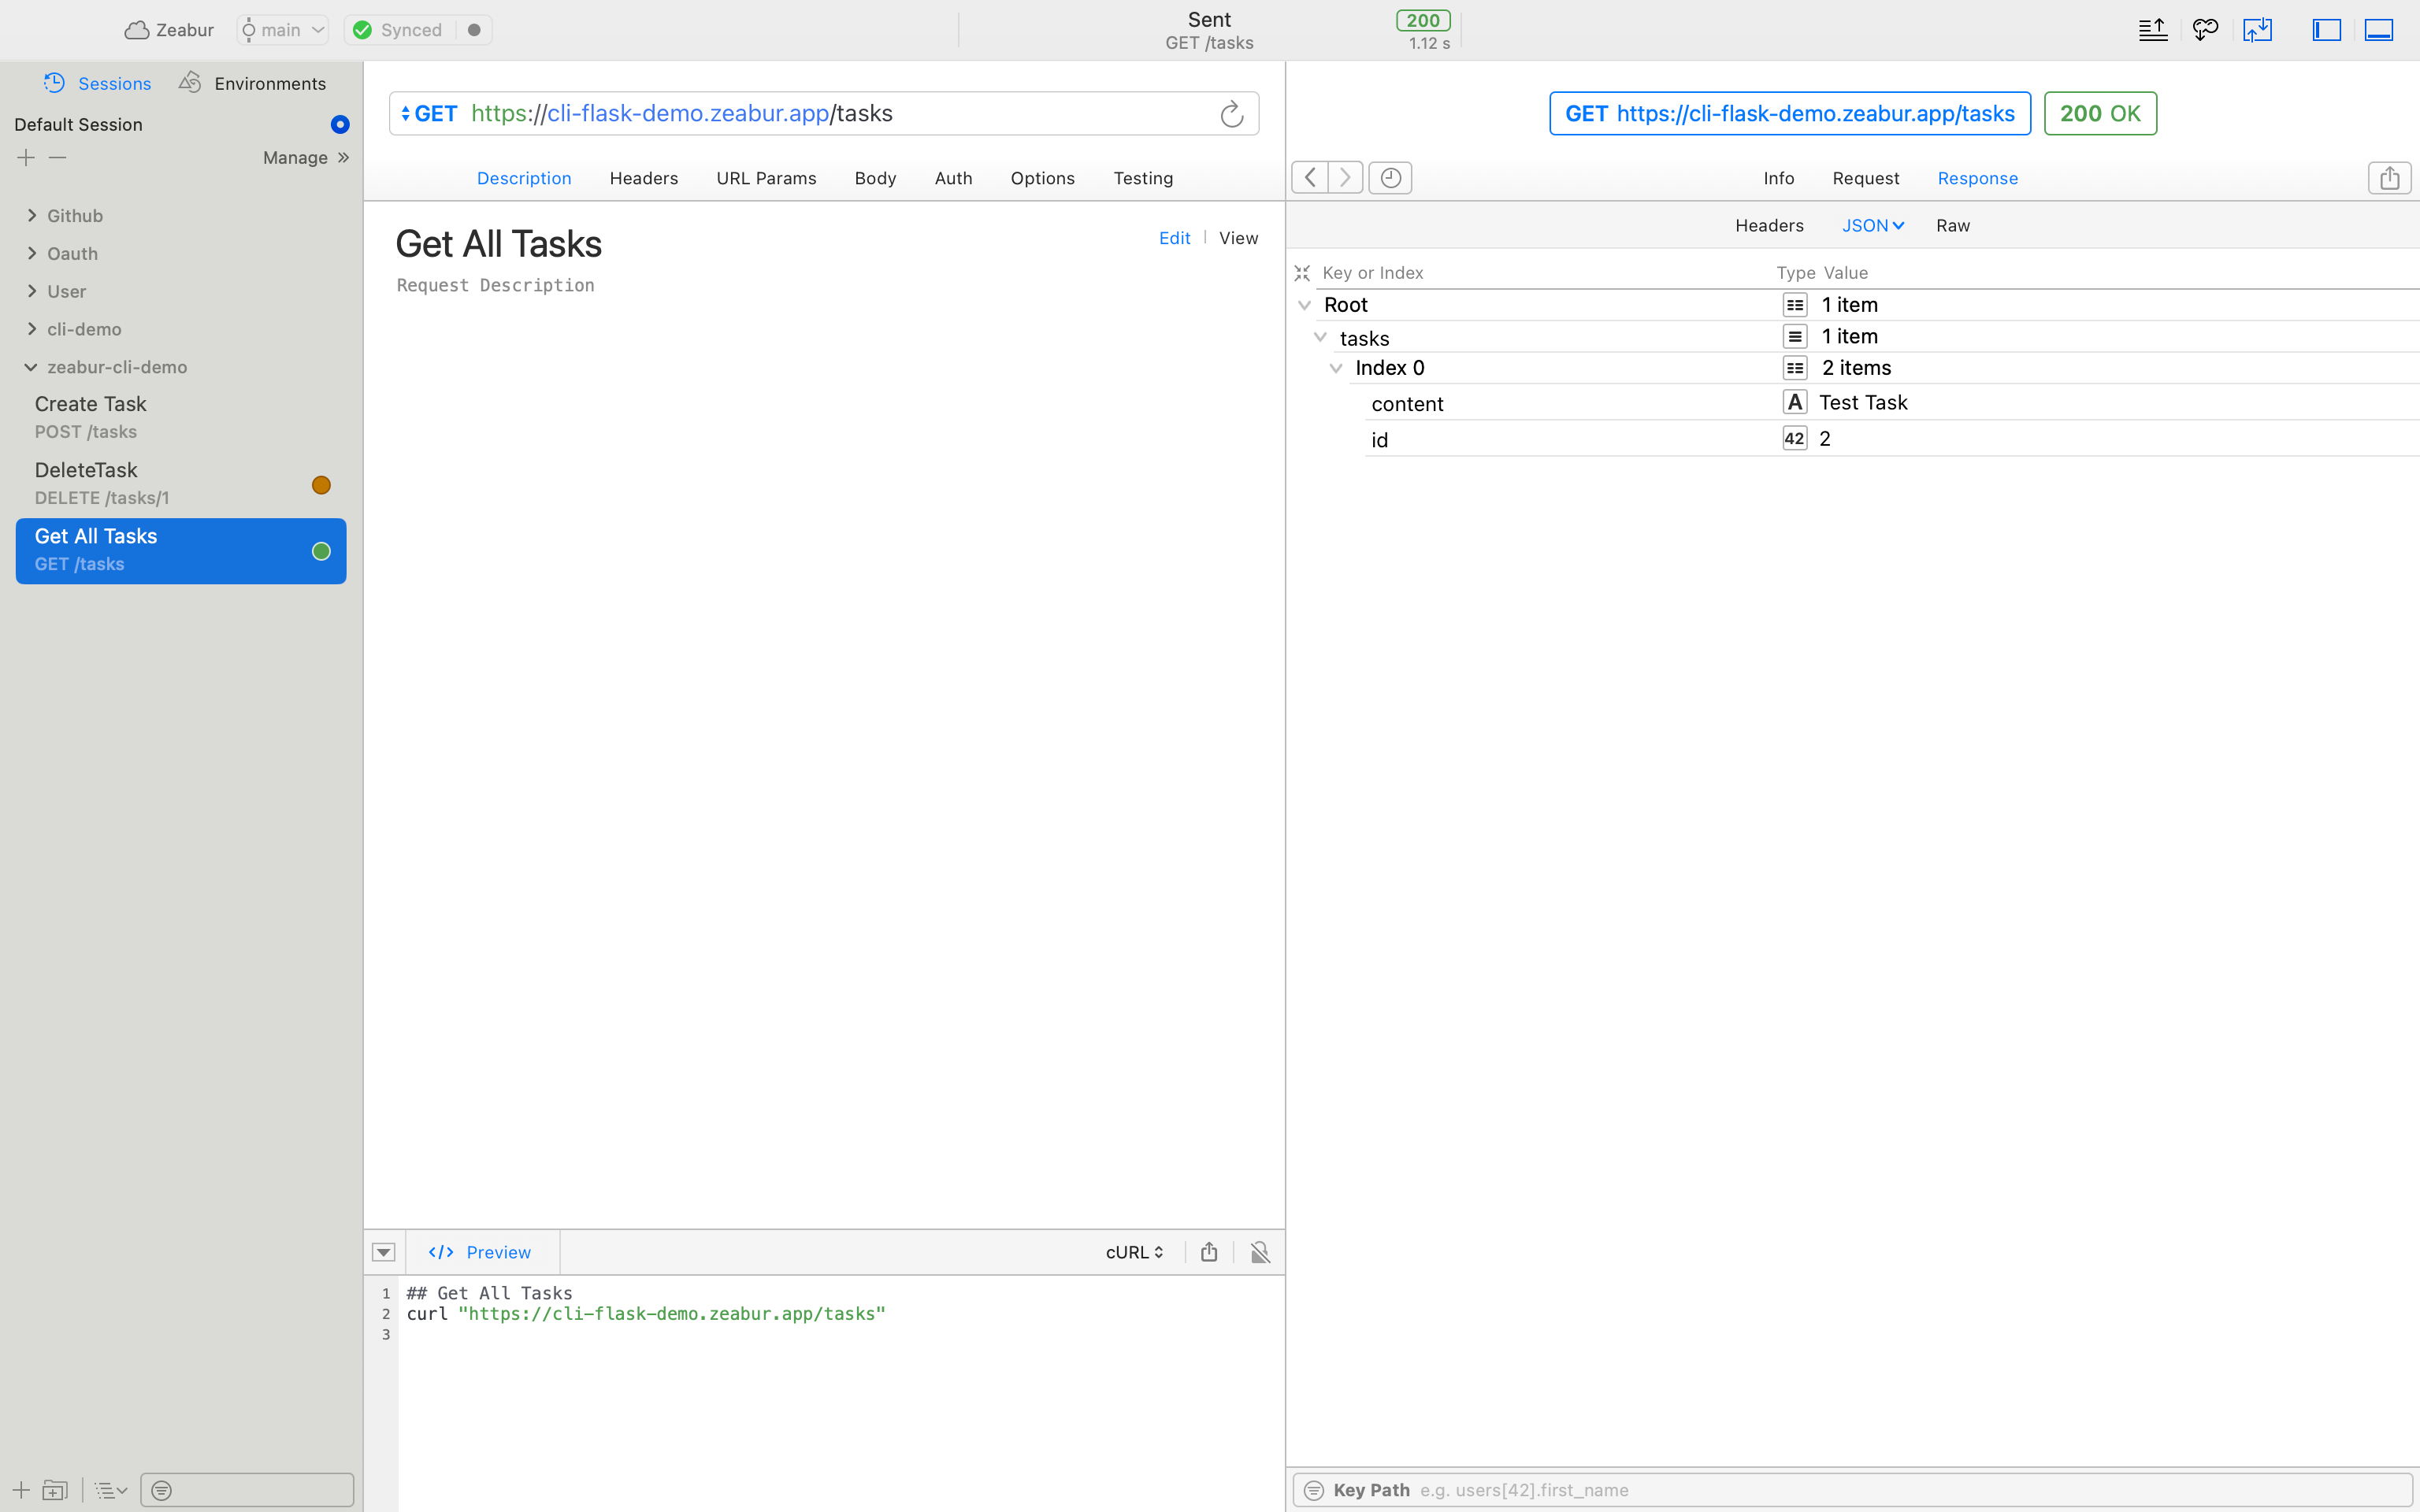
At this point, we have completed all the steps. Now we can use debugging tools like Postman or Paw to verify the deployment:
Conclusion
Using Zeabur CLI to deploy backend applications is a quick and comfortable process, which can greatly improve your efficiency in agile development, making testing and production deployment very convenient.