How to Use Notion as Blog Database - Deploy a Notion Based Blog in 3 Minutes
 Yuhang
Notion is an excellent content management system useful for creating personal and business blogs. It allows you to create shareable web pages filled with headings, text, images, and videos, which you can organize in various ways.
Why do we need a blog?
A blog is a powerful tool for sharing your thoughts, experiences, and expertise with your audience. It can help establish your online presence, foster community, and become a platform for expressing your unique ideas.
Different from Notion, your contents are visible to a wider audience when transformed into a blog. This is because blogs are indexed by search engines, making your content more discoverable and accessible to those who are interested in your topic.
How can I sync my Notion content to the blog?
Yes, you absolutely can. With Notion official APIs, you can easily get your Notion contents through a page ID. And there are many great template for building a blog website using Notion API, such as Notion Next and Nobelium.
All you need to do is to enable share and copy paste your Notion page ID, and the service will automatically sync your Notion contents into your online blog site.
Where to deploy my blog site?
There are many ways to deploy your blog site. For example, you can rent or build a server by yourself to use as a hosting machine. You can also choose some platform for deploying your site at ease. Zeabur is one of the platform for you to deploy your sites with one click.
Here is a simple tutorial for deploying Notion Next to Zeabur in 3 minutes.
Step 1: Get your account for GitHub and Zeabur
First of all, you need a GitHub account and a Zeabur account. You can use your GitHub account to sign up Zeabur.
You can check out this link to get your GitHub account. After you’ve got one, head over to https://zeabur.com and click on the Get Started button. A modal will appear showcasing a 'login with GitHub' button. Click on it, grant Zeabur permission to connect with your GitHub, and voila! You'll have your Zeabur account set up.
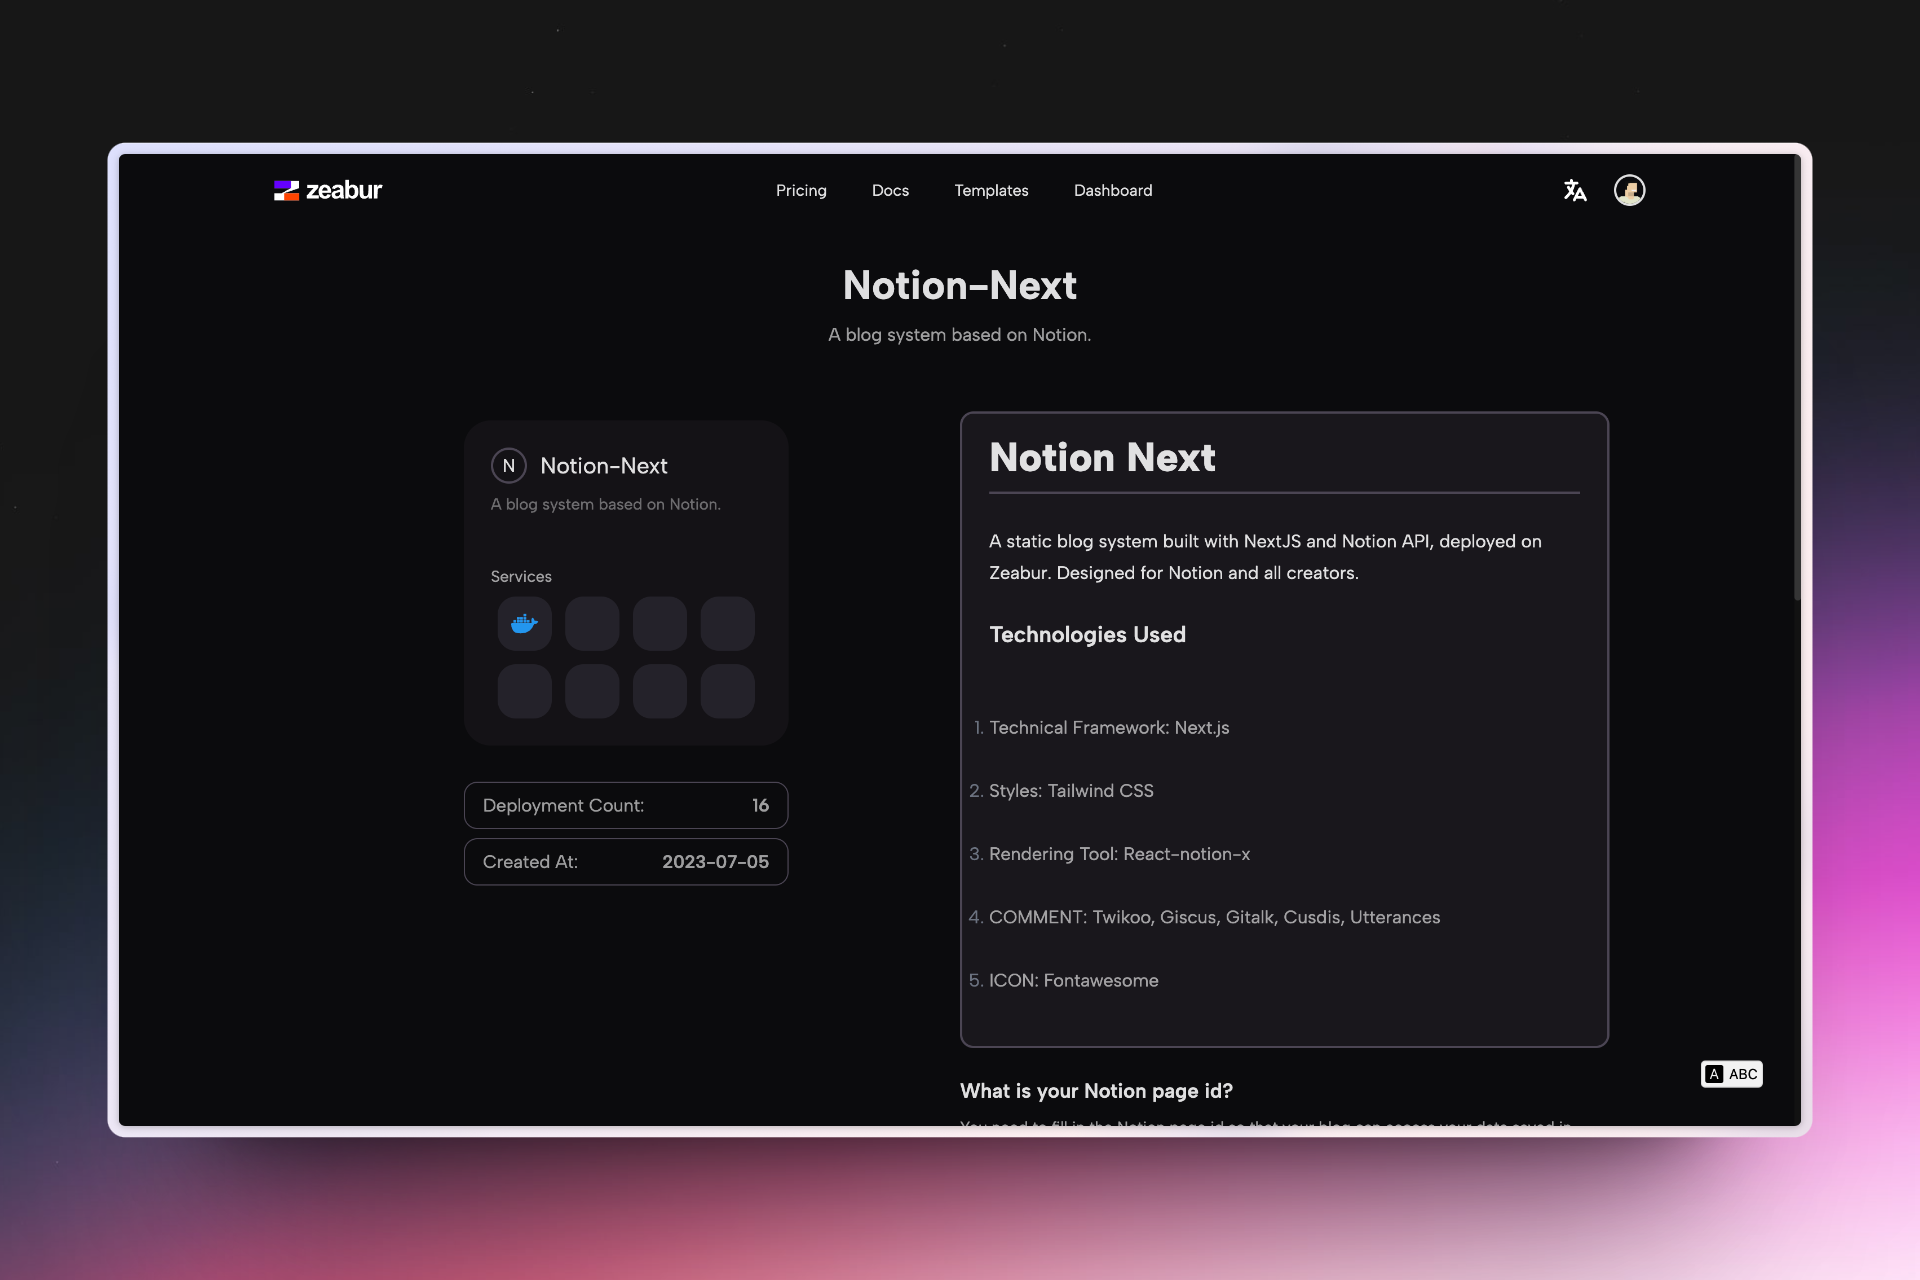
Step 2: Find the Notion Next template on Zeabur templates
After you’ve agreed Zeabur’s service terms and get your account ready, you can go to the templates gallery to find the Notion Next template.
Step 3: Follow the instructions in the template page
As you can see, you need to finish some setup for deploying this template.
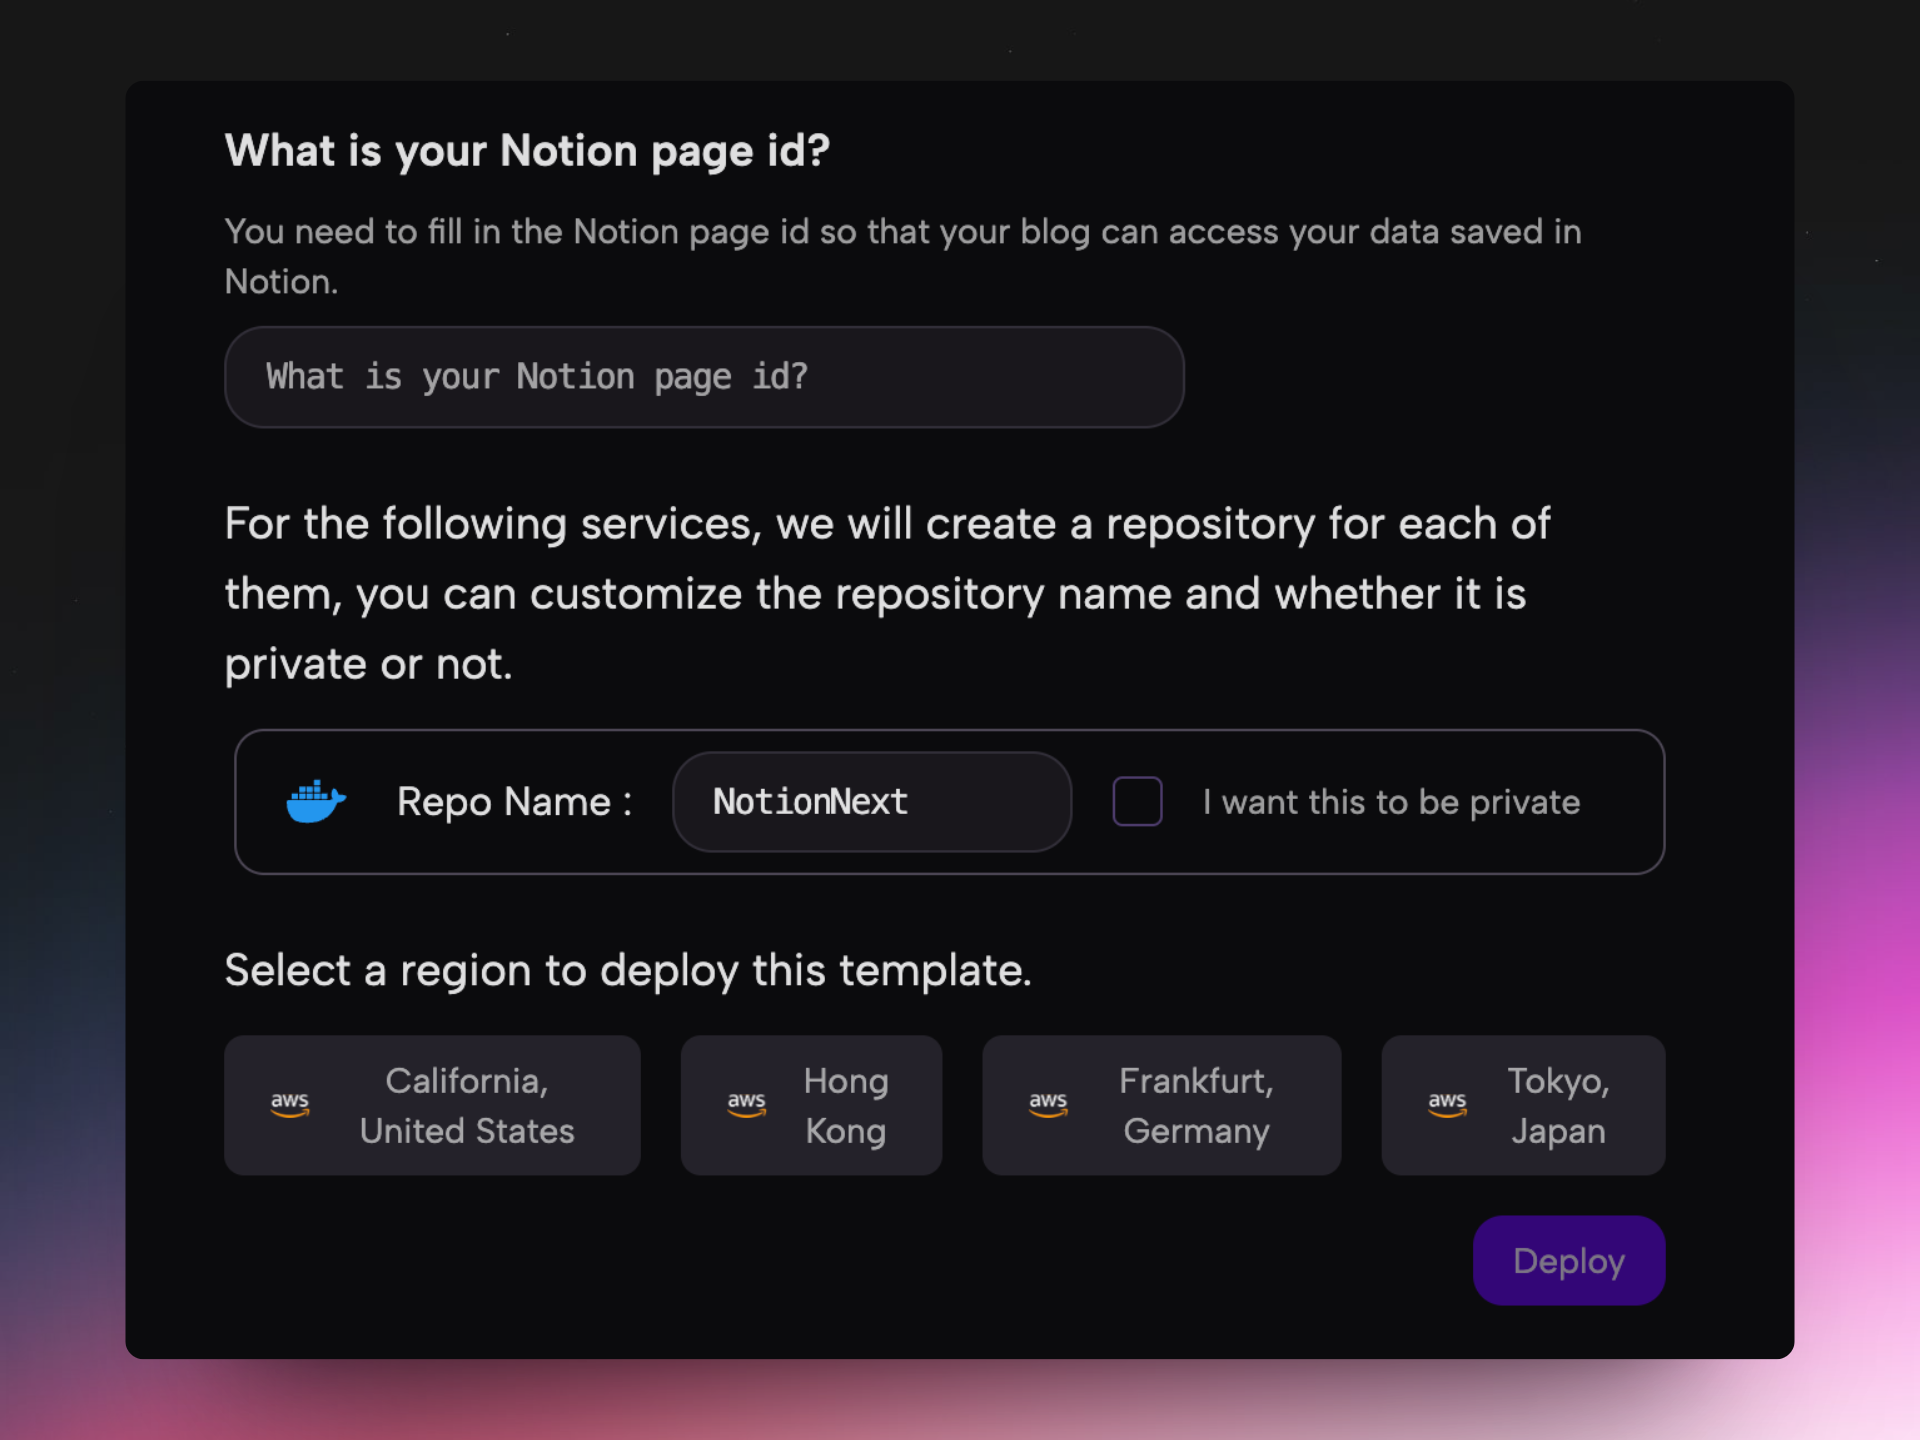
First one is your Notion page id, which is mentioned above, you need to fill in to let this service connected to your Notion database.
And then you need to specify a repo for this service, Zeabur will automatically create a GitHub repo for you binding with the service.
Last, select a region to deploy your blog and press the deploy button. The deployment will start automatically.
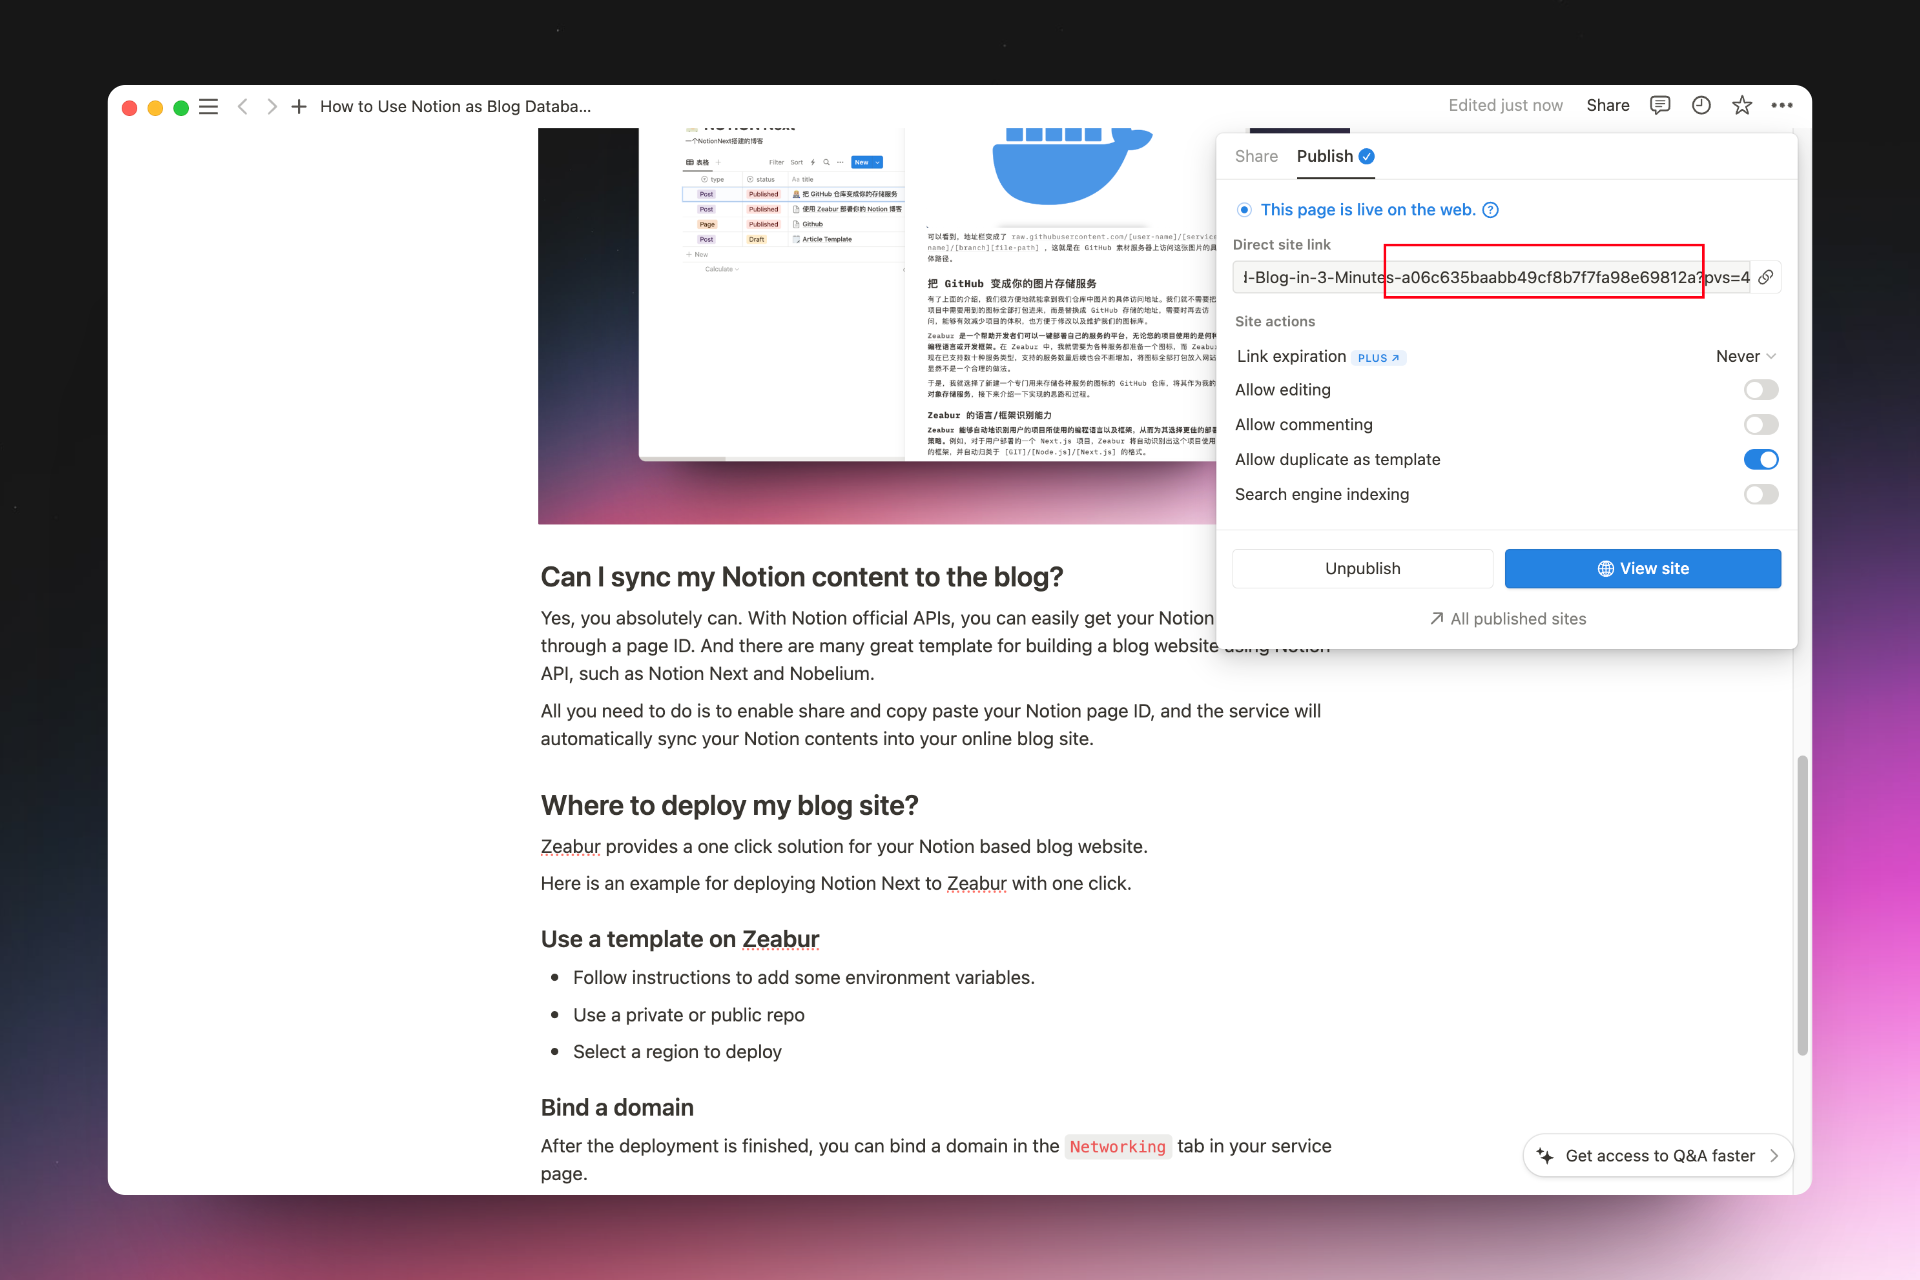
Step 4: Bind a domain to show everyone your blog
After the deployment is finished, you can bind a domain in the Networking tab in your service page.
You can either use a free sub domain ends with .zeabur.app or use your own domain by updating your DNS record.
You can also check a more detailed guide for binding domain for your blog website here.