Config Editor
When executing services, you can customize various settings through configuration files. Zeabur provides a configuration file editor that allows you to specify the storage location and content of the configuration file through the editor. The configuration file is automatically mounted when the service starts.
We use NGINX to reverse proxy the internal vaultwarden service here, to demonstrate the process of using the configuration file editor to change the NGINX configuration file.
Step 1: Create a Project
Create a Project in Zeabur Dashboard.
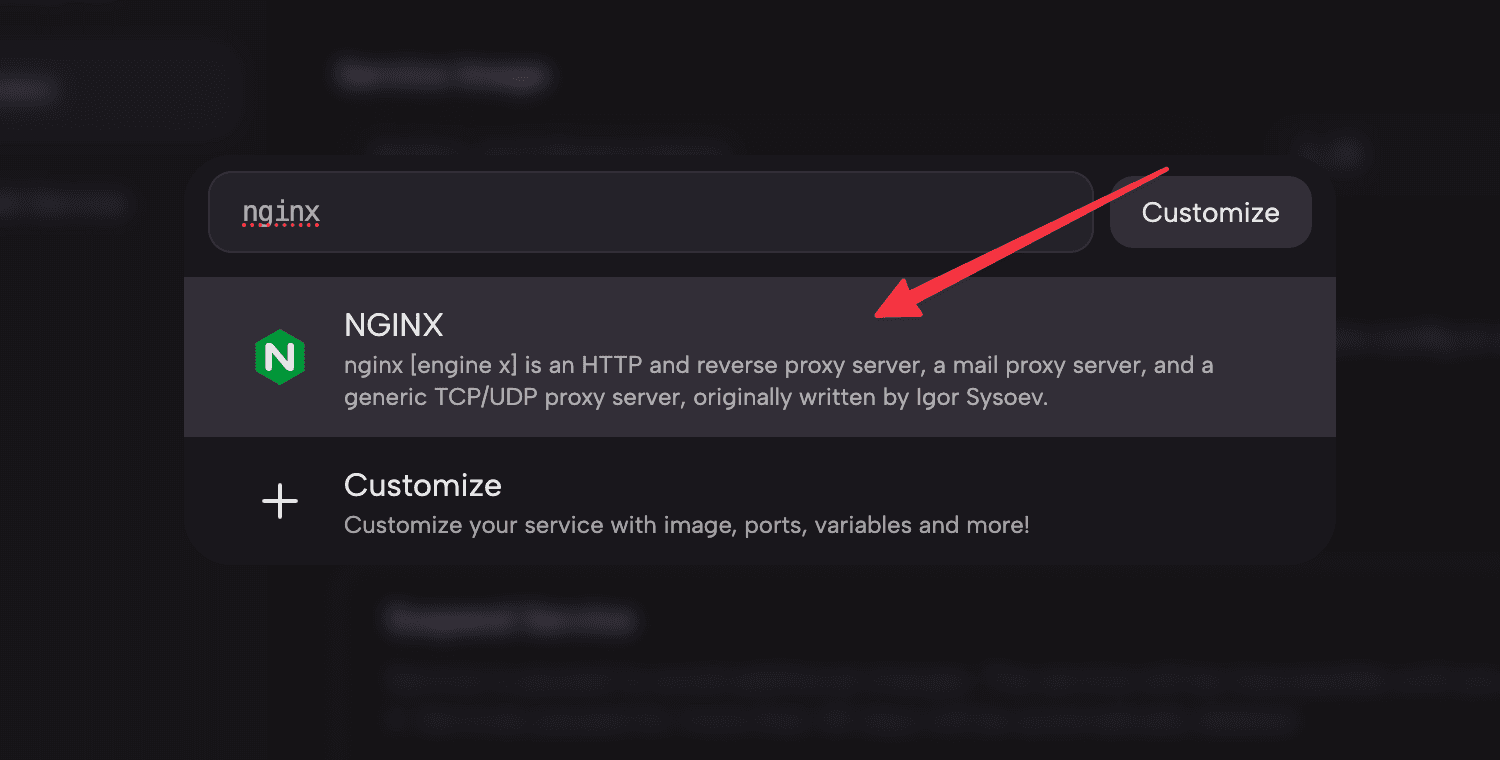
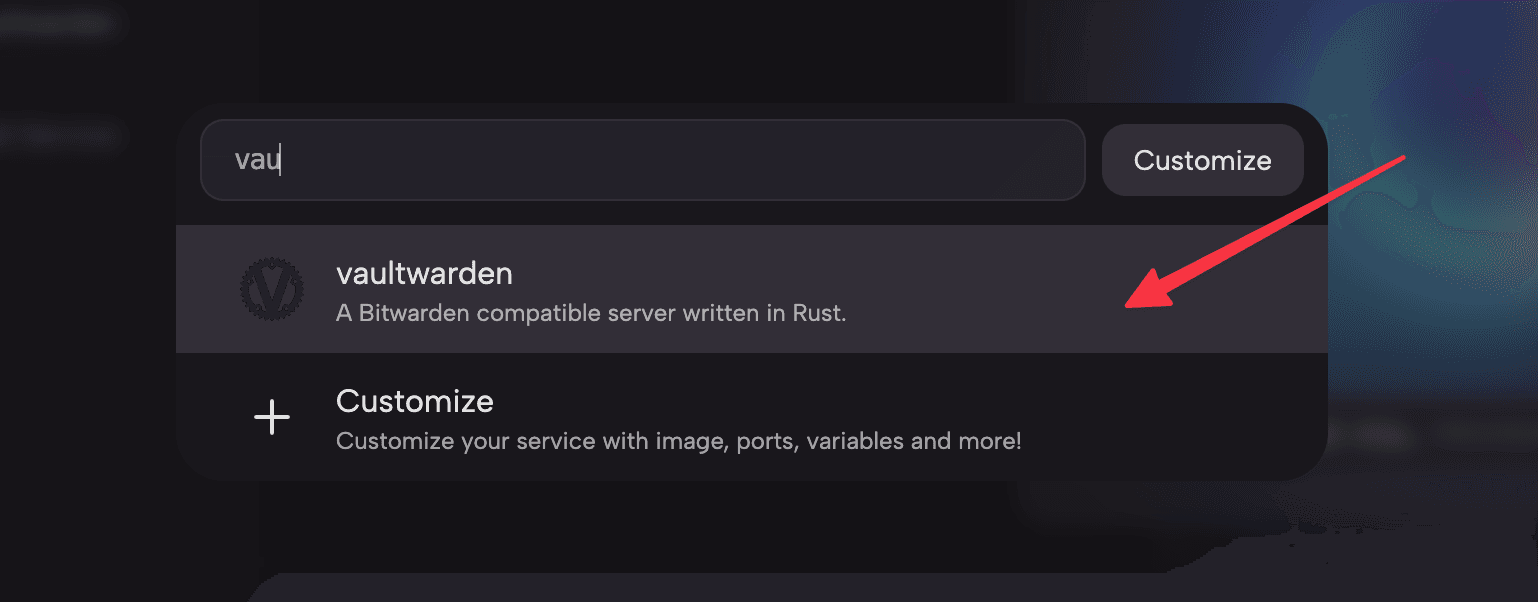
Step 2: Create Services
Create Prebuilt Services for both NGINX and Vaultwarden in the above Project.
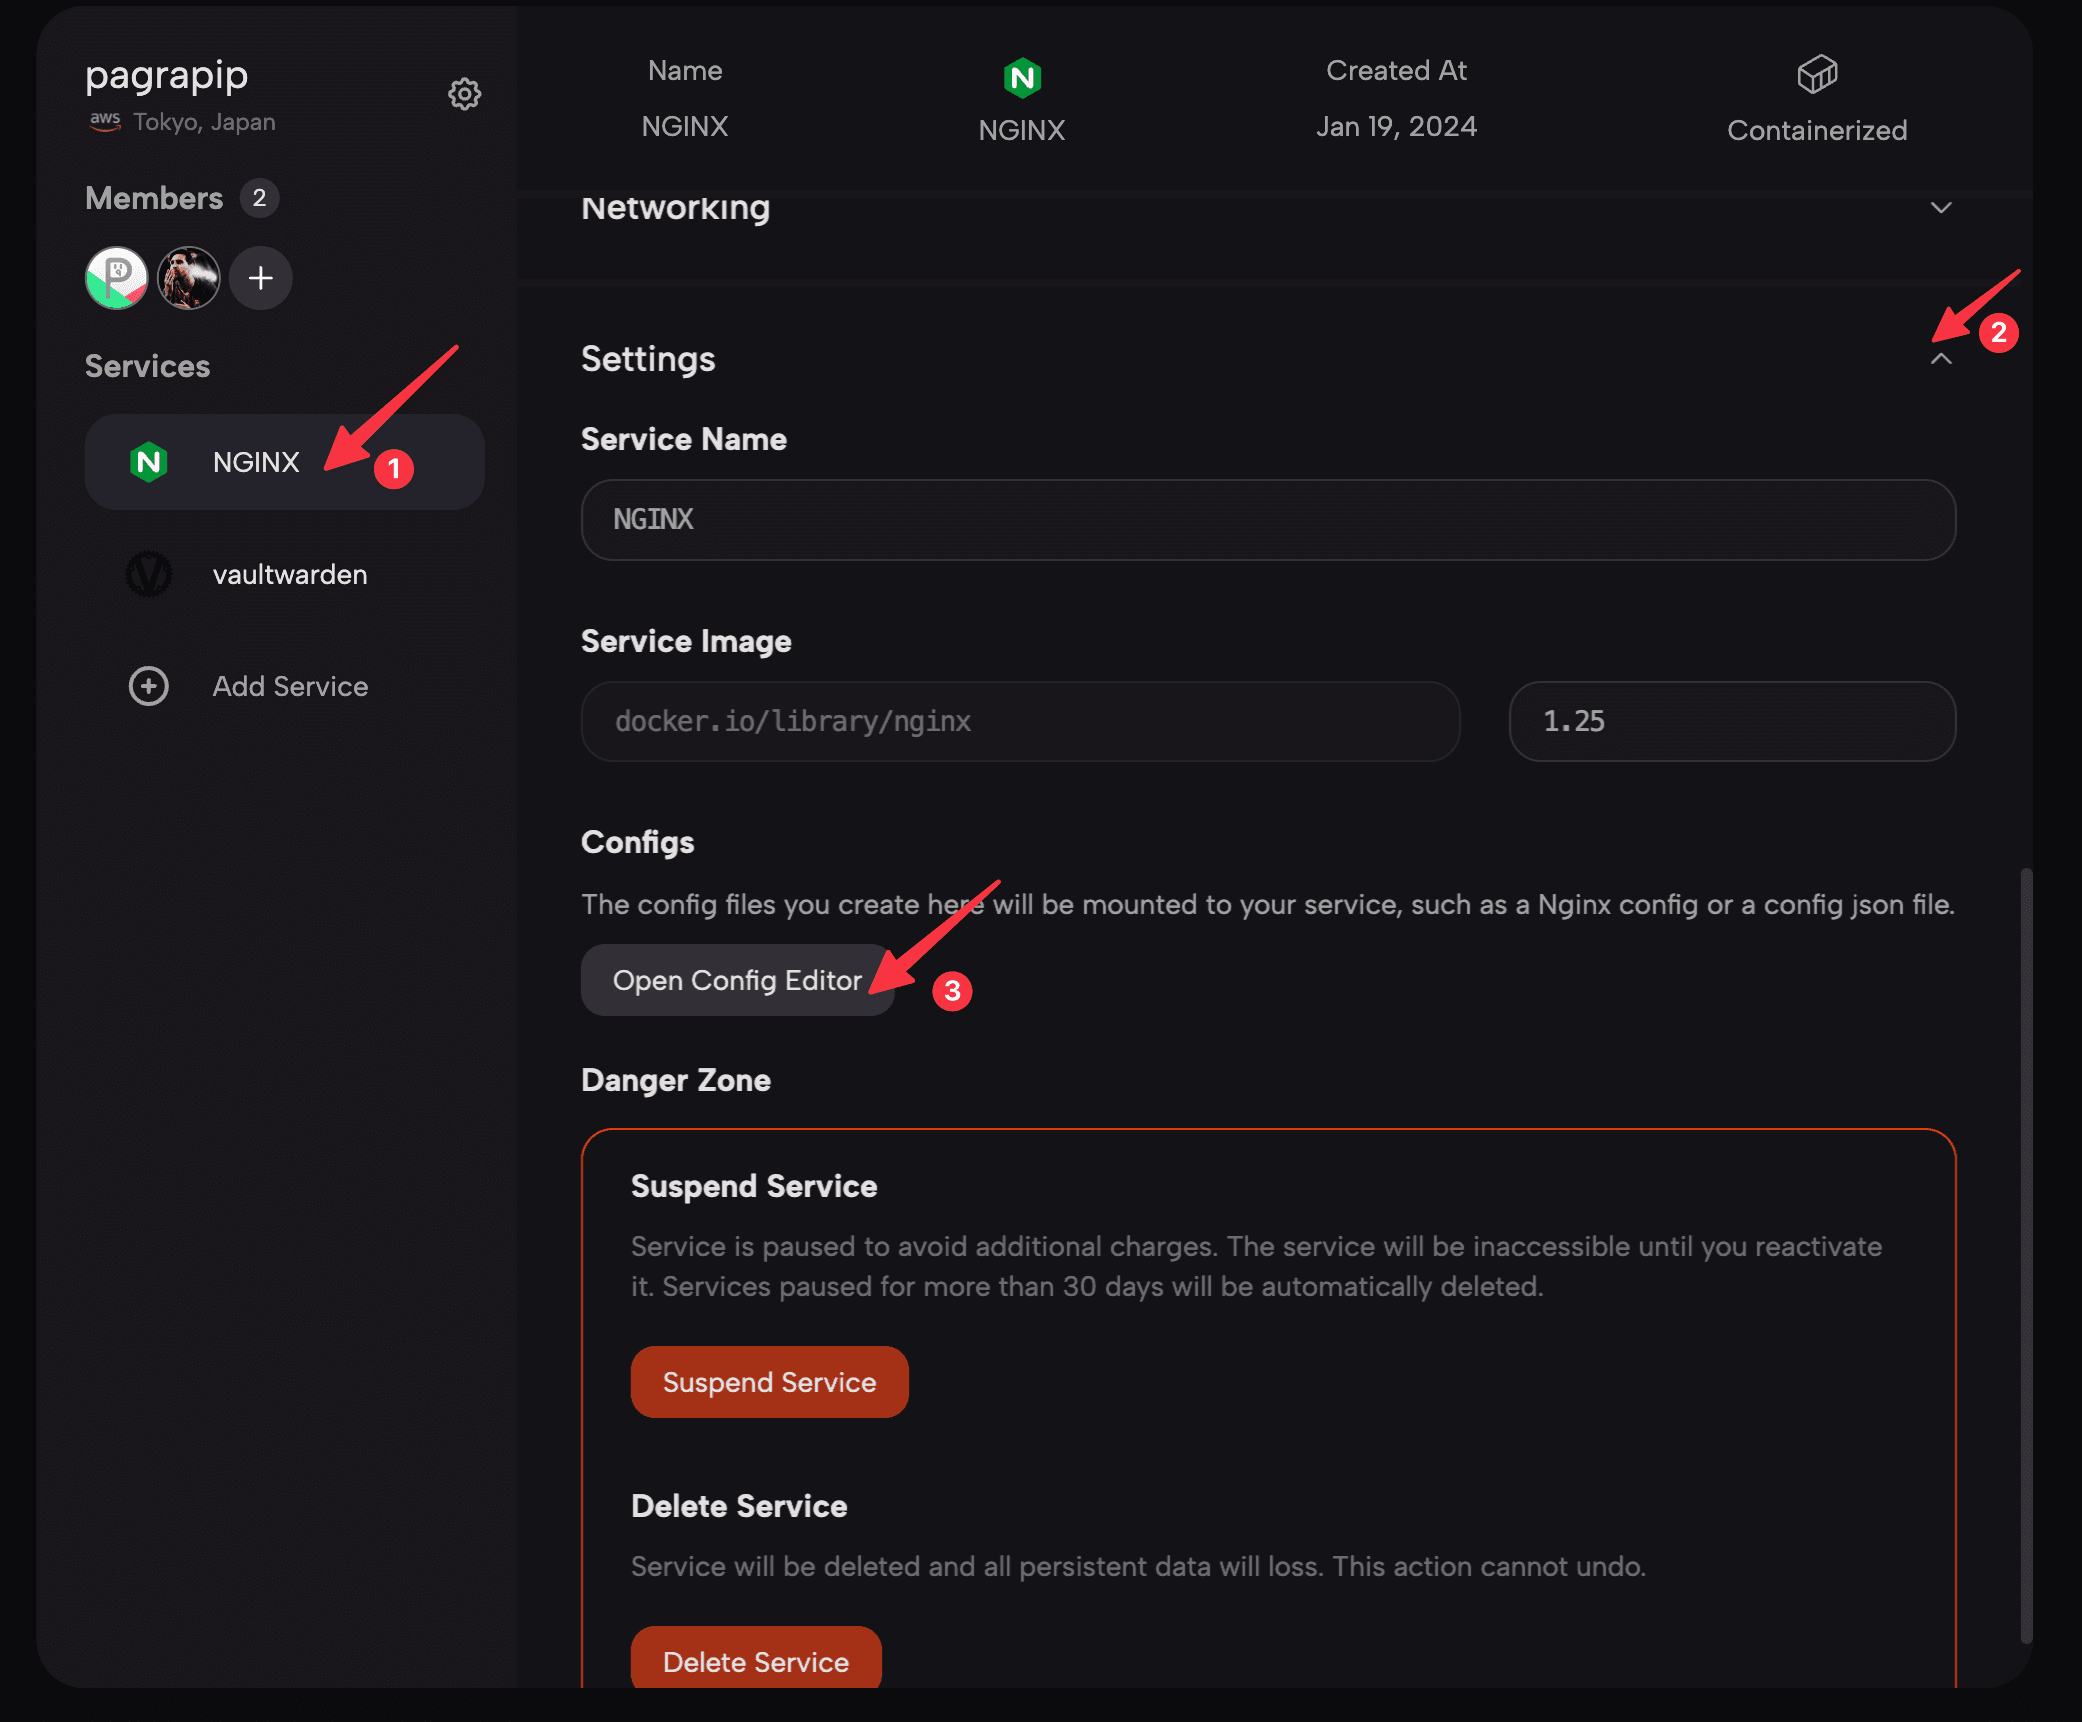
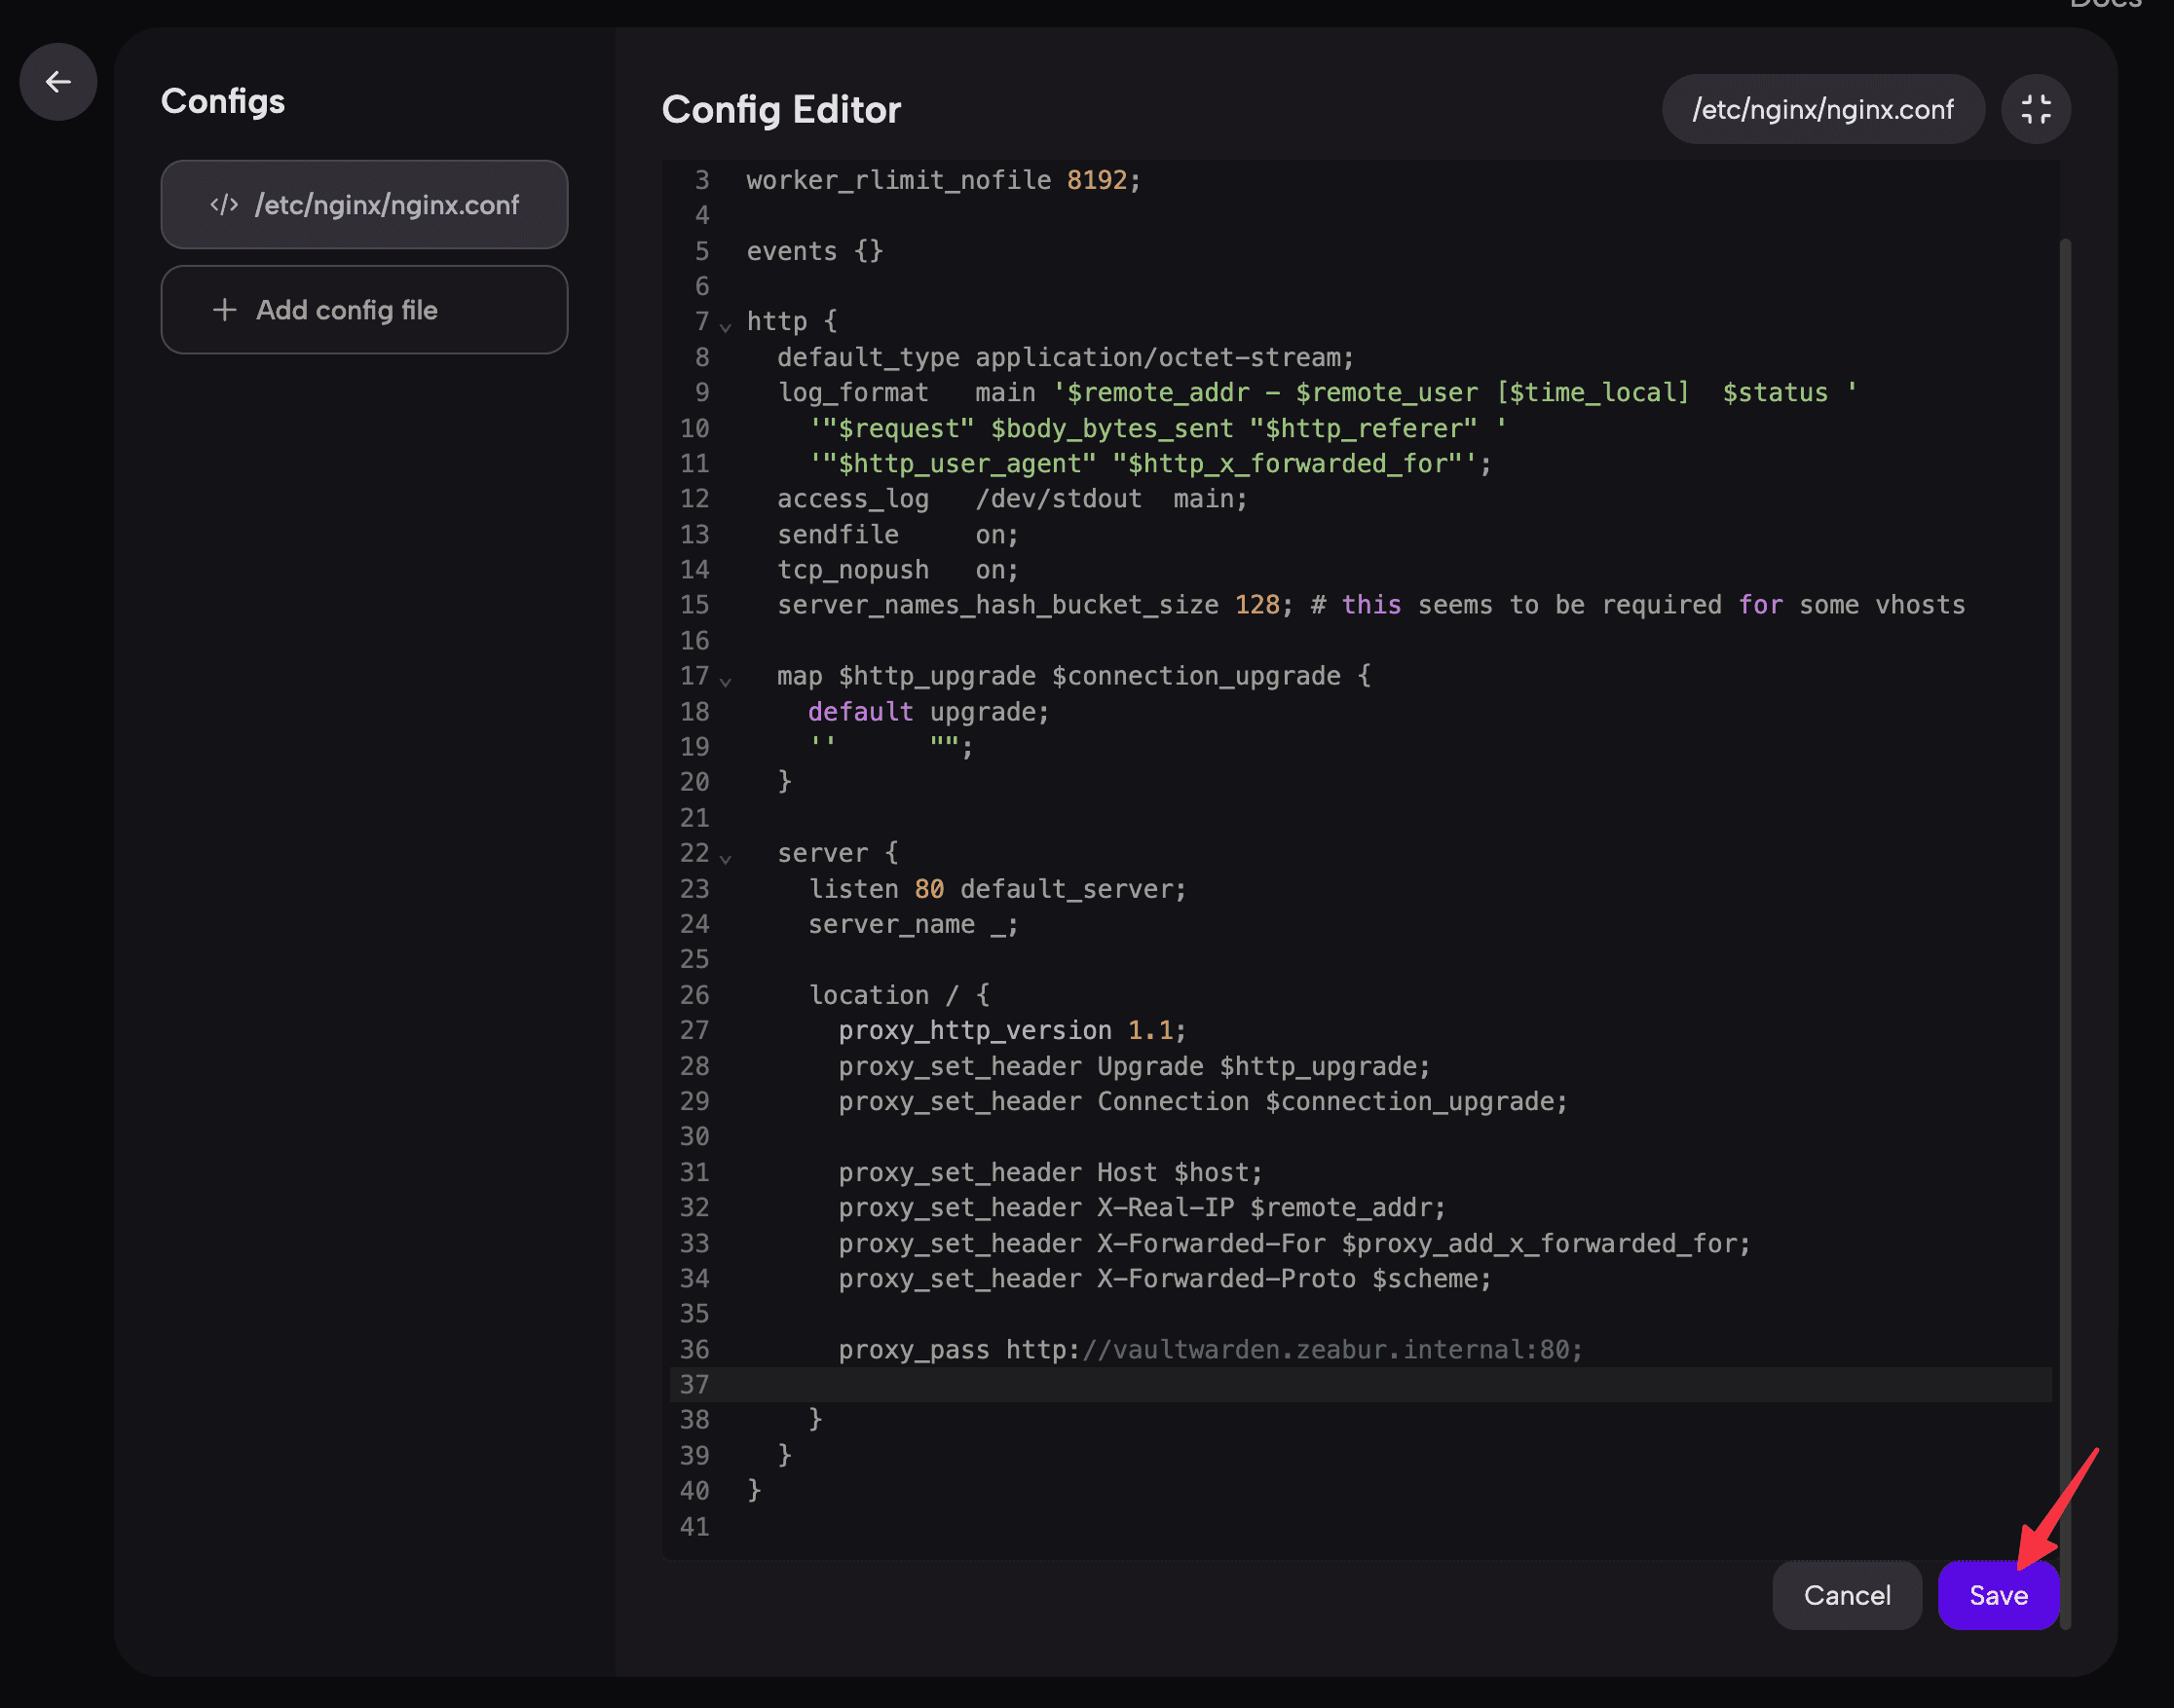
Step 3: Edit NGINX Service Configuration File
- In the Services section, click the dropdown button in the
Settingsblock of the NGINX service, find theConfigssection, and click theOpen Config Editorbutton to enter the configuration file editor.
- In the opened editor, click the
Add Config filebutton to add a new configuration file. In the pop-up form’sConfig Pathinput box, enter the path and name of the configuration file. Here, we enter/etc/nginx/nginx.conf, then click theSave Configbutton.
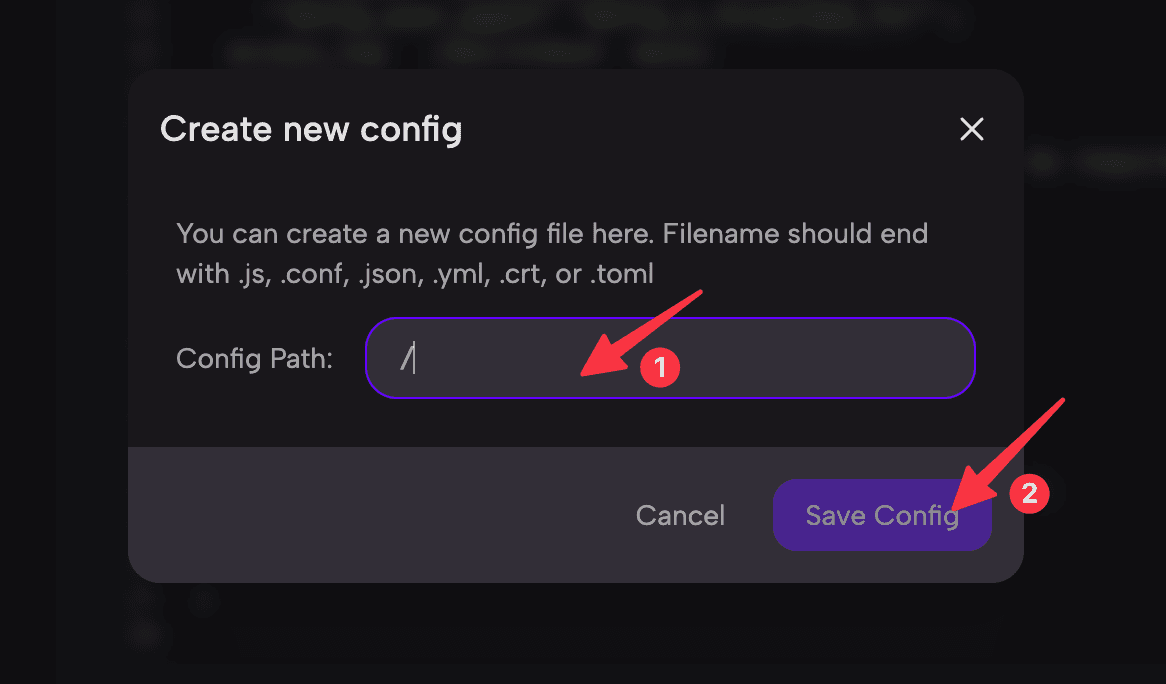
The Config Path above needs to be the absolute path of the configuration file. Please adjust according to the actual situation.
- Edit the content of the configuration file as needed. Here, we add a
serverblock to reverse proxy the Vaultwarden service.
worker_processes  4;
error_log  stderr;
worker_rlimit_nofile 8192;

events {}

http {
  default_type application/octet-stream;
  log_format   main '$remote_addr - $remote_user [$time_local]  $status '
    '"$request" $body_bytes_sent "$http_referer" '
    '"$http_user_agent" "$http_x_forwarded_for"';
  access_log   /dev/stdout  main;
  sendfile     on;
  tcp_nopush   on;
  server_names_hash_bucket_size 128; # this seems to be required for some vhosts

  map $http_upgrade $connection_upgrade {
    default upgrade;
    ''      "";
  }

  server {
    listen 80 default_server;
    server_name _;

    location / {
      proxy_http_version 1.1;
      proxy_set_header Upgrade $http_upgrade;
      proxy_set_header Connection $connection_upgrade;

      proxy_set_header Host $host;
      proxy_set_header X-Real-IP $remote_addr;
      proxy_set_header X-Forwarded-For $proxy_add_x_forwarded_for;
      proxy_set_header X-Forwarded-Proto $scheme;

      proxy_pass http://vaultwarden.zeabur.internal:80;
    }
  }
}
To allow others to access our internal Vaultwarden service through the NGINX service, we use the proxy_pass http://vaultwarden.zeabur.internal:80; directive in NGINX, indicating that NGINX should proxy all requests to this location to Vaultwarden. We use the private network feature to access Vaultwarden within our private network using a fixed hostname.
- Click the
Savebutton to save the configuration.
Step 4: Restart the Service
In the above steps, we have completed editing the configuration file. Next, we need to restart the service. Find the Instructions section and click the Restart button to restart the service so that the configuration file takes effect.

After binding the domain to the NGINX service, you can access the Vaultwarden service through the domain.

Pre-specify Configuration Files in Template YAML
You can use configs in the “Service Specification” to pre-specify the configuration files for this service. For more information, refer to the article, Create Template from YAML.